How to Change Electric Scooter Tires
How to Change Electric Scooter Tires: Tube, Tubeless & Solid Tyres
To change an electric scooter tyre, first confirm the exact tyre size and type — tube, tubeless or solid — then remove the wheel, fully deflate the old tyre, replace it without damaging the rim or tube, inflate and seat the bead correctly, reinstall the wheel, adjust the brakes and test slowly.
That sounds simple until you reach the part most YouTube guides skip: the rear wheel. On many scooters, the rear wheel is also the hub motor. That means motor cables, axle washers, anti-rotation washers, brake alignment and cable routing all matter. One wrong washer position can turn a tyre job into a motor-cable repair.
This guide covers full tyre replacement — not just puncture repair — for tube, tubeless and solid e-scooter tyres, including the rear hub-motor wheel step that causes most DIY headaches.
⚡ Quick Answer — E-Scooter Tyre Replacement in 8 Checks
First: Are You Changing a Tyre or Repairing a Puncture?
A puncture repair fixes one leak. A tyre replacement changes the actual outer tyre because it is worn, cracked, bald, cut, deformed, too slippery or the wrong type for your riding.
You should replace the tyre when you see:
- Bald tread — especially on the rear wheel where acceleration and braking wear it faster.
- Sidewall cracks — common after heat, age and underinflation.
- Repeated punctures — the tyre may have internal damage or thin rubber.
- Bulges or deformation — tyre structure may be damaged.
- Deep cuts — plugs or sealant are not enough for sidewall damage.
- Bad grip in sand, dust or wet areas — tyre compound and tread matter on UAE roads.
- Wrong tyre type for your use — for example, soft road tyres on rough delivery routes.
If you only have a small puncture, start with our e-scooter puncture repair guide. This article is for full tyre replacement.
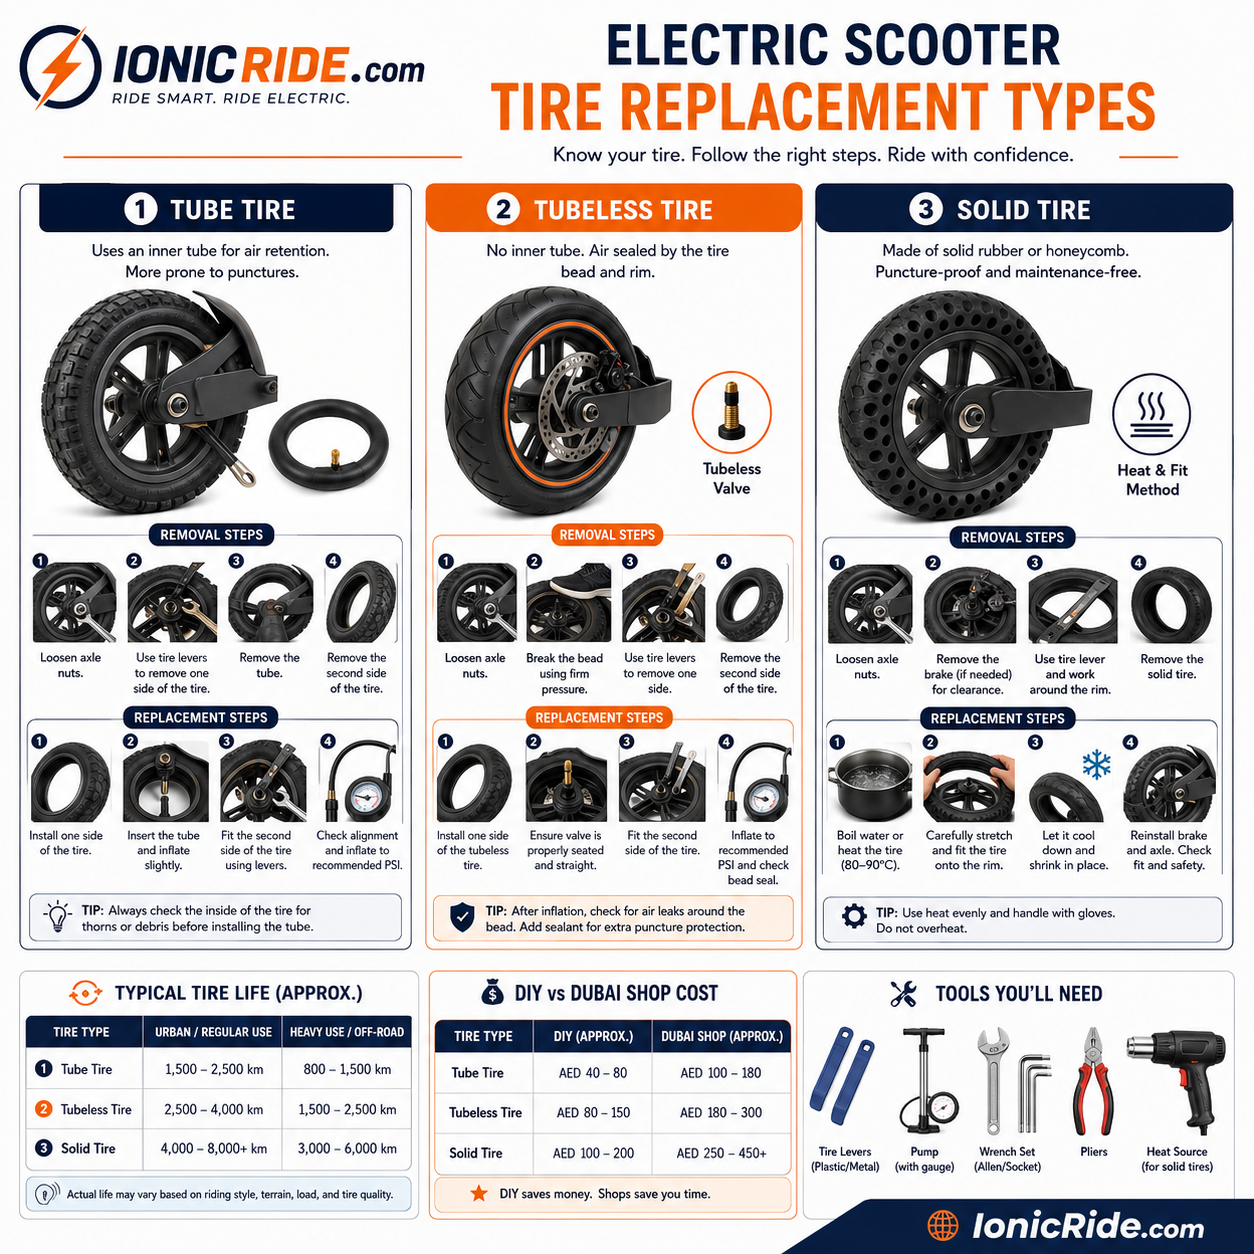
Tube vs Tubeless vs Solid Tyres: What You’re Actually Changing
Before buying parts, identify your tyre type. This affects the tools, difficulty, cost, comfort and whether DIY makes sense.
Electric Scooter Tyre Types
Know Before Buying| Tyre Type | Comfort | Puncture Risk | DIY Difficulty |
|---|---|---|---|
| Tube tyre | Good | Medium–High | Medium |
| Tubeless tyre | Good | Medium | Medium–Hard |
| Puncture-resistant tubeless | Good | Low–Medium | Hard |
| Solid / honeycomb tyre | Harsh | None | Very Hard |
Tube Tyres
Tube tyres have a separate inner tube inside the outer tyre. They are comfortable, affordable and common on budget scooters. The downside is pinch flats — especially if you ride underinflated, hit kerbs, or trap the tube with tyre levers during installation.
Tubeless Tyres
Tubeless tyres seal directly against the rim, like a car tyre. They can handle small punctures better with sealant, but they need a clean rim, good valve, correct bead seating and enough air pressure to seal properly.
Solid Tyres
Solid tyres have no air and no punctures. That sounds perfect until you ride them. They are harsher, noisier, less comfortable on rough paths and can increase vibration through the scooter. They are also the most annoying to install because the rubber is extremely tight.
Still deciding which tyre type is better for UAE roads? Read our solid tyres vs air tyres guide.
How to Read Electric Scooter Tyre Size
The correct tyre size is printed on the tyre sidewall. Do not order based only on the scooter model name, because the same model family can have different wheel sizes across years or versions.
Common markings include:
- 8.5×2 — common on Xiaomi-style scooters.
- 10×2.125 — common on many commuter scooters.
- 10×2.5 — wider 10-inch tyre on some stronger models.
- 60/70-6.5 — common motorcycle-style sizing on wider scooter tyres.
- 255×80 — metric style used on some solid tyre listings.
A tyre that is “almost the same” can be impossible to seat, rub the mudguard, touch the brake caliper, or come off the rim. Match the sidewall size, rim type and tyre style before buying.
Tools You Need to Change an Electric Scooter Tyre
The exact tools depend on tyre type and wheel position, but these are the basics:
- Tyre levers — plastic or proper metal levers with smooth edges.
- Allen keys / hex keys — for mudguards, brake calipers and covers.
- Socket or spanner set — for axle nuts, especially rear hub motors.
- Pump with pressure gauge — guessing tyre pressure is how punctures come back.
- Valve core remover — useful for tubeless work and full deflation.
- Soapy water — helps bead seating and reveals air leaks.
- Cable ties — for rerouting motor cables neatly after wheel installation.
- Phone camera — photograph washer order and cable routing before removal.
- Heat source for solid tyres — hot water softening is common, but be careful and avoid damaging parts.
Do not use sharp screwdrivers as tyre levers. They scratch rims, puncture tubes, damage tubeless beads and can slip into your hand. Proper tyre levers are cheaper than replacing a rim or tube twice.
How to Change a Tube Electric Scooter Tyre
Tube tyres are the most common DIY tyre replacement job. The main danger is pinching the new tube while fitting the tyre back onto the rim.
- Power off the scooter. Unplug the charger and place the scooter on a stable work surface.
- Remove the wheel. For a front wheel, this may be simple axle bolts. For a rear hub-motor wheel, follow the special rear-wheel section below before pulling anything.
- Deflate the old tube completely. Remove the valve cap and press the valve until all air is out. A half-inflated tube makes tyre removal harder and riskier.
- Remove one side of the tyre bead. Use tyre levers slowly around the rim. Start opposite the valve and avoid forcing the lever too deep.
- Pull out the old tube. Remove the valve first, then slide the tube out. Check where the puncture or failure happened.
- Inspect the tyre and rim. Feel inside the tyre for glass, wire, thorns or sharp rubber. Check rim tape if the scooter uses it.
- Lightly inflate the new tube. Just enough air to give it shape. This reduces the chance of twisting or pinching.
- Insert the tube and align the valve. The valve should sit straight, not pulled at an angle.
- Refit the tyre carefully. Work around the bead with your hands first, then levers only when needed. Keep checking that the tube is not trapped under the tyre bead.
- Inflate slowly and inspect the bead. Stop halfway, spin the wheel and make sure the tyre sits evenly all around.
- Inflate to recommended pressure. Use the sidewall or manual pressure, then reinstall the wheel and test the brakes.
If the new tube goes flat in five minutes, it was probably pinched during installation, cut by something still inside the tyre, or damaged by an exposed rim edge. Do not blame the tube until you inspect the tyre and rim properly.
How to Change a Tubeless Electric Scooter Tyre
Tubeless tyres are cleaner than tubes once fitted correctly, but they are less forgiving during installation. The tyre bead must seal against the rim evenly, and the valve must not leak.
- Remove the wheel and deflate fully. Remove the valve core if needed to release all air.
- Break the tyre bead. Push the tyre sidewall away from the rim all around both sides. This can be hard on small scooter rims.
- Remove the old tyre with levers. Work slowly and avoid scratching the bead seat area of the rim.
- Clean the rim. Dirt, old sealant, rubber flakes or corrosion can stop the new tyre from sealing.
- Inspect or replace the tubeless valve. A bad valve can make a new tyre look like it has a puncture.
- Mount the new tyre in the correct rotation direction. Many tyres have an arrow on the sidewall. Match it to forward wheel rotation.
- Use soapy water on the bead. This helps the tyre slide into place and reduces tearing.
- Inflate quickly enough to seat the bead. Some tubeless tyres need a strong pump or compressor to pop the bead into place.
- Check for leaks with soapy water. Bubbles around the valve or bead mean the seal is not right.
- Reinstall and test slowly. Tubeless tyres can lose pressure after the first seating, so recheck pressure after the first ride.
Sealant can help small punctures, but it will not fix a torn sidewall, damaged rim, bad valve or tyre that is not seated properly. Treat sealant as prevention, not magic.
How to Change a Solid Electric Scooter Tyre
Solid tyres are the “no puncture” solution, but they are the hardest to install. The tyre is smaller than the rim opening by design, so it fits extremely tight once stretched into place.
The basic method is:
- Confirm exact rim compatibility. Solid tyres must match the rim size very closely. “10 inch” alone is not enough.
- Remove the wheel from the scooter. Trying to fit a solid tyre while the wheel is still mounted is a frustration test, not a repair method.
- Remove the old tyre and tube/tubeless valve. Clean the rim and check for damage.
- Soften the solid tyre. Many technicians use hot water to make the rubber more flexible. Do not melt it, burn it or use unsafe heat.
- Use clamps, levers or a proper press. Work the tyre onto the rim gradually. Keep fingers clear because the tyre can snap back hard.
- Check seating all around. The tyre must sit evenly in the rim channel. A twisted solid tyre will wobble badly.
- Reinstall and test for vibration. Solid tyres can feel rough even when installed correctly, so check that the wheel spins true and does not rub.
If this is your rear hub-motor wheel, paying a shop is often worth it. Solid tyre installation plus motor cable risk plus brake alignment can turn a “cheap DIY upgrade” into an expensive repair.
The Hard Part: Removing a Rear Hub-Motor Wheel
This is where most generic tyre guides fail. On many electric scooters, the rear wheel is not just a wheel — it is the motor. The axle carries power and signal wires through or near the axle. Pulling, twisting or trapping that cable can damage the motor, hall sensors or phase wires.
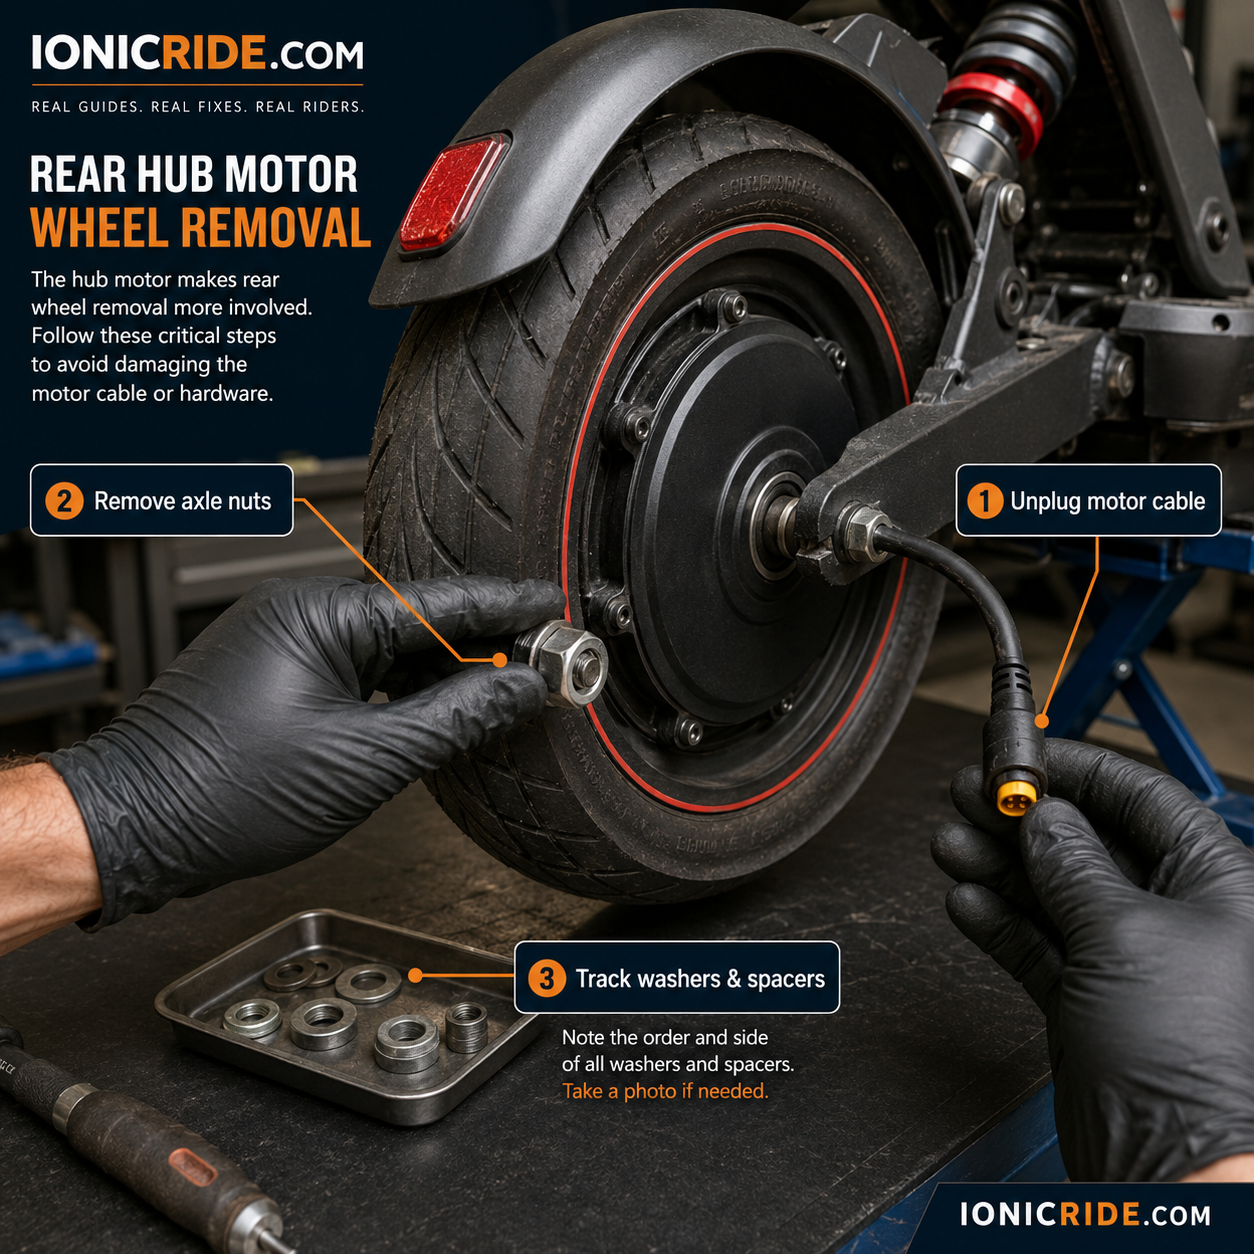
Rear Hub-Motor Wheel Removal Steps
- Photograph everything before removal. Take photos of cable routing, axle washer order, brake caliper position and how the motor cable enters the frame.
- Find the motor cable connector. Some scooters have a waterproof connector outside the deck. Others require opening the deck to unplug the motor cable from the controller.
- Do not pull the cable through forcefully. If the connector will not pass through the frame hole, stop. Some models need the deck cover opened first.
- Remove cable ties and clips carefully. Cut only the zip tie, not the motor cable insulation.
- Remove brake caliper if needed. If the disc brake blocks wheel removal, unbolt the caliper and hang it safely. Do not squeeze the brake lever while the wheel is out.
- Loosen axle nuts on both sides. Use the correct socket or spanner. Avoid rounding the nut.
- Record washer order. Many hub motors use flat washers, spacers and anti-rotation washers. Their orientation matters.
- Slide the wheel out gently. Support the wheel so the cable is never holding its weight.
- Change the tyre with the cable protected. Keep the cable away from tyre levers, rim edges and the floor.
- Reinstall with axle flats seated correctly. The motor axle must sit fully in the dropout. Anti-rotation washers must lock into position.
- Route the cable exactly like before. Keep it away from tyre, brake disc, suspension, folding parts and sharp deck edges.
- Spin the wheel before riding. Check brake rub, motor cable clearance, disc alignment and axle tightness.
Never let the wheel hang by the motor cable. That cable is not a handle. Pulling it can damage internal motor wiring or hall sensor wires, creating a fault that costs far more than the tyre replacement.
Tyre Life: How Many Kilometres Do E-Scooter Tyres Last?
Tyre life depends heavily on rider weight, tyre pressure, road surface, braking style, heat, scooter power and whether it is front or rear. Rear tyres usually wear faster because they handle more acceleration, braking and load.
Typical Electric Scooter Tyre Life
Mileage Guide| Tyre Type | Typical Life | What Shortens It |
|---|---|---|
| Budget tube tyre | 800–1,800 km | Low pressure, kerbs, heavy braking, rough paths |
| Quality tube tyre | 1,200–2,500 km | Pinch flats, heat cracks, worn tread |
| Standard tubeless tyre | 1,500–3,000 km | Low pressure, bead leaks, valve failure |
| Puncture-resistant tubeless | 2,000–4,000 km | Sharp debris, sidewall cuts, aggressive riding |
| Solid / honeycomb tyre | 3,000–6,000 km | Heat, vibration, cracking, poor installation |
These are realistic working ranges, not promises. A careful 65 kg rider on smooth paths can get much more life than a 110 kg rider using full throttle, low pressure and hard braking on rough surfaces.
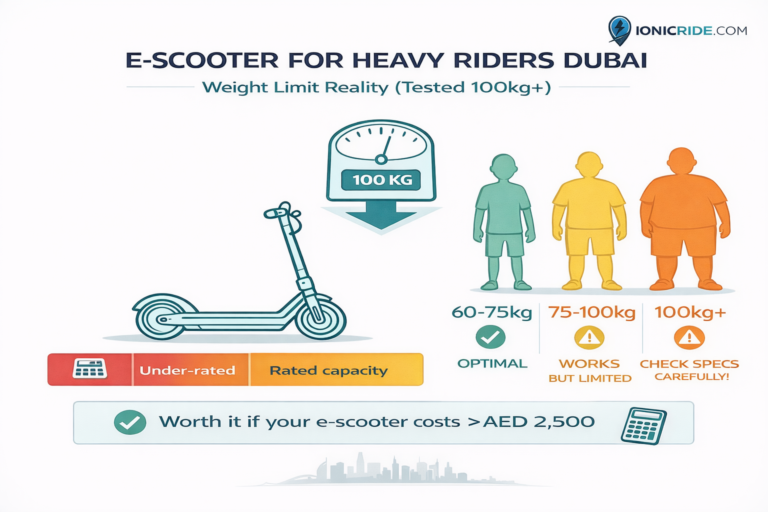
Rider weight changes tyre wear, range and motor load. See our electric scooter guide for heavy riders for the full breakdown.
DIY vs Dubai Shop Cost: What Tyre Replacement Usually Costs
Tyre replacement cost depends on tyre size, tyre type, wheel position and how difficult the scooter is to open. Rear hub-motor wheels usually cost more than front wheels because the motor cable, brake disc and washer order add labour risk.
Typical Dubai Tyre Replacement Cost
AED Estimate| Job | DIY Parts | Shop Total |
|---|---|---|
| Inner tube replacement | AED 30–60 | AED 80–140 |
| Tube tyre + tube | AED 80–180 | AED 150–300 |
| Standard tubeless tyre | AED 120–250 | AED 230–370 |
| Puncture-resistant tubeless tyre | AED 250–400 | AED 330–520 |
| Solid / honeycomb tyre fitting | AED 60–150+ | AED 180–450+ |
| Rear hub-motor tyre job | Parts only | Add AED 50–150 labour depending on model |
For a simple front tube tyre, DIY can make sense. For a rear hub-motor solid tyre, the shop cost often buys you three things: proper tools, lower risk, and someone else dealing with the cable and brake alignment.
Need a shop instead of DIY? Use our Dubai e-scooter repair shop guide and Dubai scooter repair cost breakdown.
Common Electric Scooter Tyre Replacement Mistakes
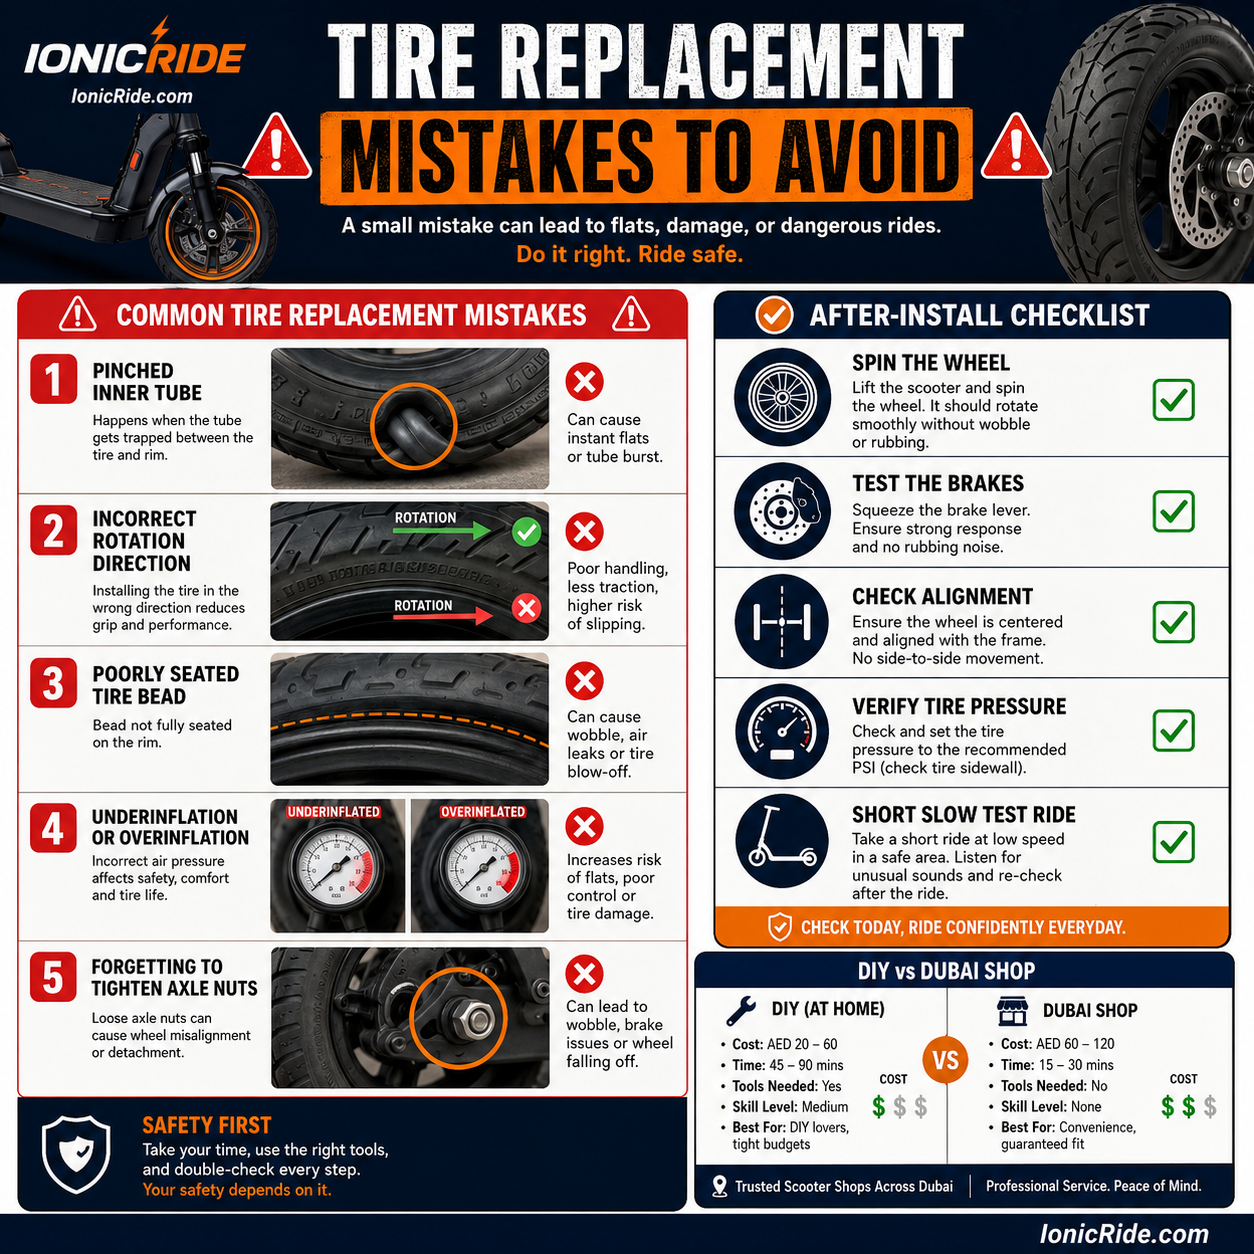
Buying the wrong tyre size. A close match is not enough on small scooter rims.
Using screwdrivers as tyre levers. They damage tubes, rims and tubeless beads.
Pinching the new tube. The tyre goes on, then the tube fails immediately.
Mounting the tyre backwards. Directional tyres have arrows for a reason.
Ignoring the valve angle. A crooked valve can tear or leak under pressure.
Forgetting washer order. Rear hub-motor anti-rotation washers must go back correctly.
Letting the motor wheel hang by the cable. That cable damage can become a motor fault.
Not checking brake rub. Wheel removal often shifts disc brake alignment.
Riding without pressure check. Low pressure causes pinch flats, poor range and unstable handling.
Skipping the test ride inspection. Recheck axle nuts, tyre seating and brakes after the first few minutes.
After Replacement: Final Safety Check
Do not finish the job when the tyre is fitted. Finish when the scooter rides straight, brakes cleanly and the wheel spins without rubbing.
- Tyre direction — arrow points in the correct rolling direction.
- Bead seated evenly — no high or low spots around the rim.
- Correct pressure — check with a gauge, not finger squeeze.
- Valve straight — not pulled sideways or trapped.
- Axle nuts tight — wheel secure with washers in correct order.
- Motor cable clear — not touching tyre, brake disc or suspension.
- Brake disc not rubbing badly — spin wheel and listen.
- No wobble — lift the wheel and spin it slowly.
- Slow test ride done — no vibration, clicking or pulling to one side.
If the brake rubs or feels weak after the wheel goes back on, use our e-scooter brake adjustment guide before riding normally.
Why the Scooter Feels Different After New Tyres
A new tyre can change the ride more than beginners expect. This is normal if you changed tyre type, width, tread pattern or pressure.
- More grip: fresh rubber can feel slower but safer, especially under braking.
- Less range: wider or softer tyres can increase rolling resistance.
- More vibration: solid tyres transmit more road shock through the scooter.
- Different steering: wider tyres can feel more stable but slower to turn.
- Brake rub after reinstall: removing a wheel can shift caliper alignment slightly.
- Temporary bead settling: tubeless tyres may need pressure recheck after the first ride.
If your range drops after tyre replacement, check tyre pressure first, then read why your e-scooter battery dies too fast.
Dubai Roads: Which Tyre Type Makes Sense?
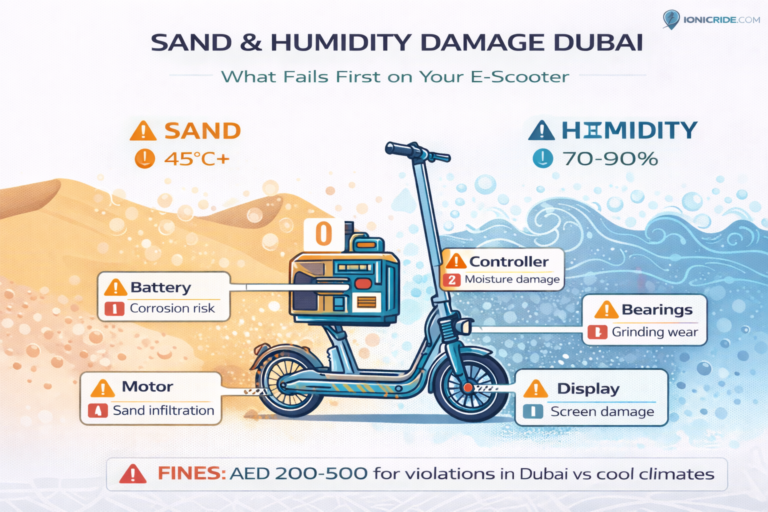
Dubai is not just smooth Marina paths. You also get dusty cycle tracks, tiled areas, speed bumps, construction debris, hot pavement, sand patches and sharp kerb transitions. That changes the tyre decision.
For Comfort and Grip
Choose pneumatic tyres — tube or tubeless. They absorb vibration better, grip better and are nicer for daily riding. Keep pressure correct or they will puncture and wear quickly.
For Fewer Punctures
Choose quality tubeless tyres with sealant, or puncture-resistant tubeless tyres if available for your size. This is often the best balance for commuters.
For Zero Punctures
Choose solid tyres only if you accept the harsher ride. They make sense for riders who keep getting flats and ride short routes, but they are not the smoothest option.
For Delivery or Heavy Daily Use
Use stronger tyres, check pressure often and avoid cheap no-name rubber. Delivery riders usually wear rear tyres faster because of load, braking and daily mileage.
For summer riding, tyre pressure and rubber condition matter more. Read our Dubai summer e-scooter survival guide.
The Bottom Line
Changing an electric scooter tyre is doable, but the difficulty depends on tyre type and wheel position. Front tube tyres are the easiest. Tubeless tyres need proper bead sealing. Solid tyres are hard. Rear hub-motor wheels need real care.
The rear hub-motor wheel is the step most guides skip. Photograph the washer order, protect the motor cable, seat the axle correctly and check brake alignment before riding.
DIY makes sense for simple jobs, but not every tyre job is worth fighting at home. If it is a rear solid tyre, a stuck tubeless bead, a damaged rim or a motor cable routing issue, paying a Dubai repair shop can be cheaper than fixing your own mistake.
Puncture or Full Tyre Replacement?
If the tyre is still healthy, repair the puncture. If it is worn, cracked or damaged, replace it properly.
Frequently Asked Questions
Yes, especially if it is a front tube tyre and you have proper tyre levers, a pump and patience. Rear hub-motor wheels, tubeless beads and solid tyres are harder, so many riders use a shop for those jobs.
Check the tyre sidewall, valve and manual. Tube tyres use an inner tube. Tubeless tyres have an air valve but no inner tube and seal against the rim. Solid tyres have no air valve and cannot be inflated.
Usually yes. The rear wheel often contains the hub motor, so you must handle motor cables, axle nuts, anti-rotation washers, brake discs and cable routing carefully. Pulling the motor cable or reinstalling washers wrongly can cause serious problems.
A simple inner tube replacement may cost around AED 80–140 total, while tubeless and solid tyre jobs cost more. Rear hub-motor wheels usually add labour because cable handling and brake alignment take extra time.
Sometimes, if the solid tyre is made for the exact rim size. Solid tyres remove punctures but make the ride harsher, increase vibration and are much harder to install. They are not always the best choice for comfort or grip.
Common causes include uneven bead seating, wrong tyre size, pinched tube, twisted solid tyre, bent rim, incorrect washer order, loose axle nuts or brake rub after wheel reinstallation.
Most tyres last roughly 1,000–4,000 km depending on tyre type, rider weight, pressure, road surface, heat and braking style. Solid tyres can last longer, but they trade comfort for puncture resistance.
Not always. Replace the damaged or worn tyre first. But if both tyres are old, cracked, bald or mismatched, replacing both can improve braking, stability and ride feel.
Use the pressure printed on the tyre sidewall or listed in your scooter manual. Do not guess by feel. Underinflated scooter tyres cause pinch flats, poor range, unstable steering and faster wear.
Sealant helps with small punctures and slow leaks, but it will not fix a cut sidewall, damaged rim, torn valve or badly seated bead. It is useful prevention, not a replacement for proper fitting.