How to Assemble an Electric Scooter Out of the Box
How to Assemble an Electric Scooter Out of the Box: First Setup Guide
To assemble an electric scooter out of the box, raise and lock the stem, connect any handlebar cable, attach the handlebar, tighten the bolts evenly, charge the battery fully, pair the app if required, then complete a full pre-first-ride safety check before you touch the throttle.
Most new scooters do not arrive “ready to ride.” They arrive mostly built, but the important parts — handlebar screws, folding lock, brake feel, tyre pressure, app activation and first charge — still need your attention. That 30-minute setup is the difference between a smooth first ride and the classic day-one problem: loose bars, a wobbly stem, dead battery, locked app, or brakes that were never tested.
This guide walks through a careful setup routine for a new electric scooter, based on manufacturer manuals and my own riding experience in Dubai, before a beginner’s first ride.
⚡ Quick Answer — Electric Scooter Setup in 8 Moves
What Should Be in the Box?
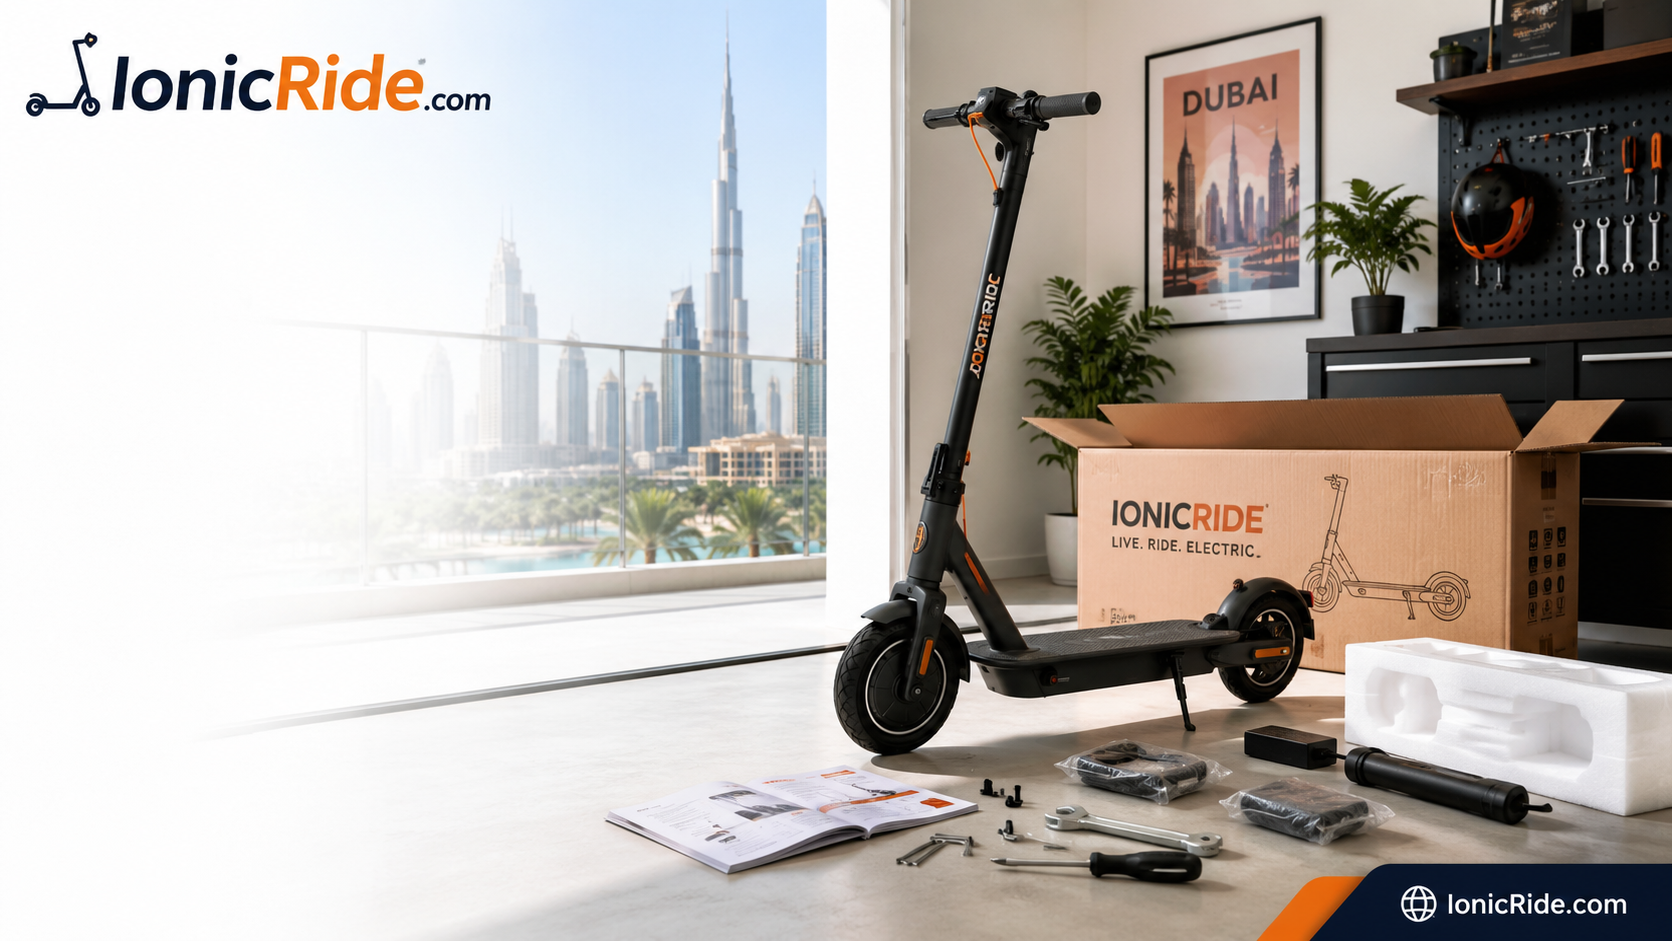
Before you start assembling anything, lay everything out on the floor and check the parts. Do this before you throw away the packaging, because small screws and plastic caps love hiding inside foam blocks.
- The scooter body — usually with the stem folded down and the handlebar not attached.
- Handlebar — sometimes already wired, sometimes separate with a display cable connector.
- Screws or bolts — commonly four handlebar/stem screws, depending on model.
- Allen key / hex key — the basic tool supplied by most brands.
- Original charger — do not swap chargers between scooters unless voltage and connector are correct.
- User manual — boring, yes, but it may contain the exact bolt direction, tyre pressure and activation steps.
- Accessories — bell, reflectors, valve extension, spare screws, rubber plugs or display covers depending on brand.
A scooter can look ready while still being unsafe. The handlebar may be loose, the folding latch may not be fully locked, tyres may be soft from shipping, and the app may still be in transport mode. Assemble first, check second, ride last.
Step Zero: Inspect for Shipping Damage
New scooters get handled roughly during shipping. A tiny crack, bent brake lever or crushed cable can become a real problem once you are standing on the deck at 20 km/h. Spend two minutes checking these areas:
- Frame and deck: no cracks, deep dents, twisted deck or battery cover damage.
- Display: no cracked screen, loose power button or moisture under the display lens.
- Brake levers: not bent, not jammed and returning smoothly after you squeeze them.
- Cables: not cut, crushed, stretched or trapped near the folding joint.
- Tyres: no cuts, flat spots, missing valve cap or sidewall damage.
- Charger: correct plug, no cracked casing, no bent pins and no burning smell.
If anything looks damaged, take photos before assembly and contact the seller. Once you ride it, arguing that it arrived damaged becomes much harder.
Still shopping? Read our where to buy an electric scooter in Dubai guide before choosing between Dragon Mart, Noon, Amazon and physical stores.
How to Assemble an Electric Scooter Out of the Box
The exact design varies by brand, but most standing e-scooters follow the same setup pattern. Xiaomi, Ninebot, Navee, Kugoo-style scooters and many budget UAE models all use some version of this process.
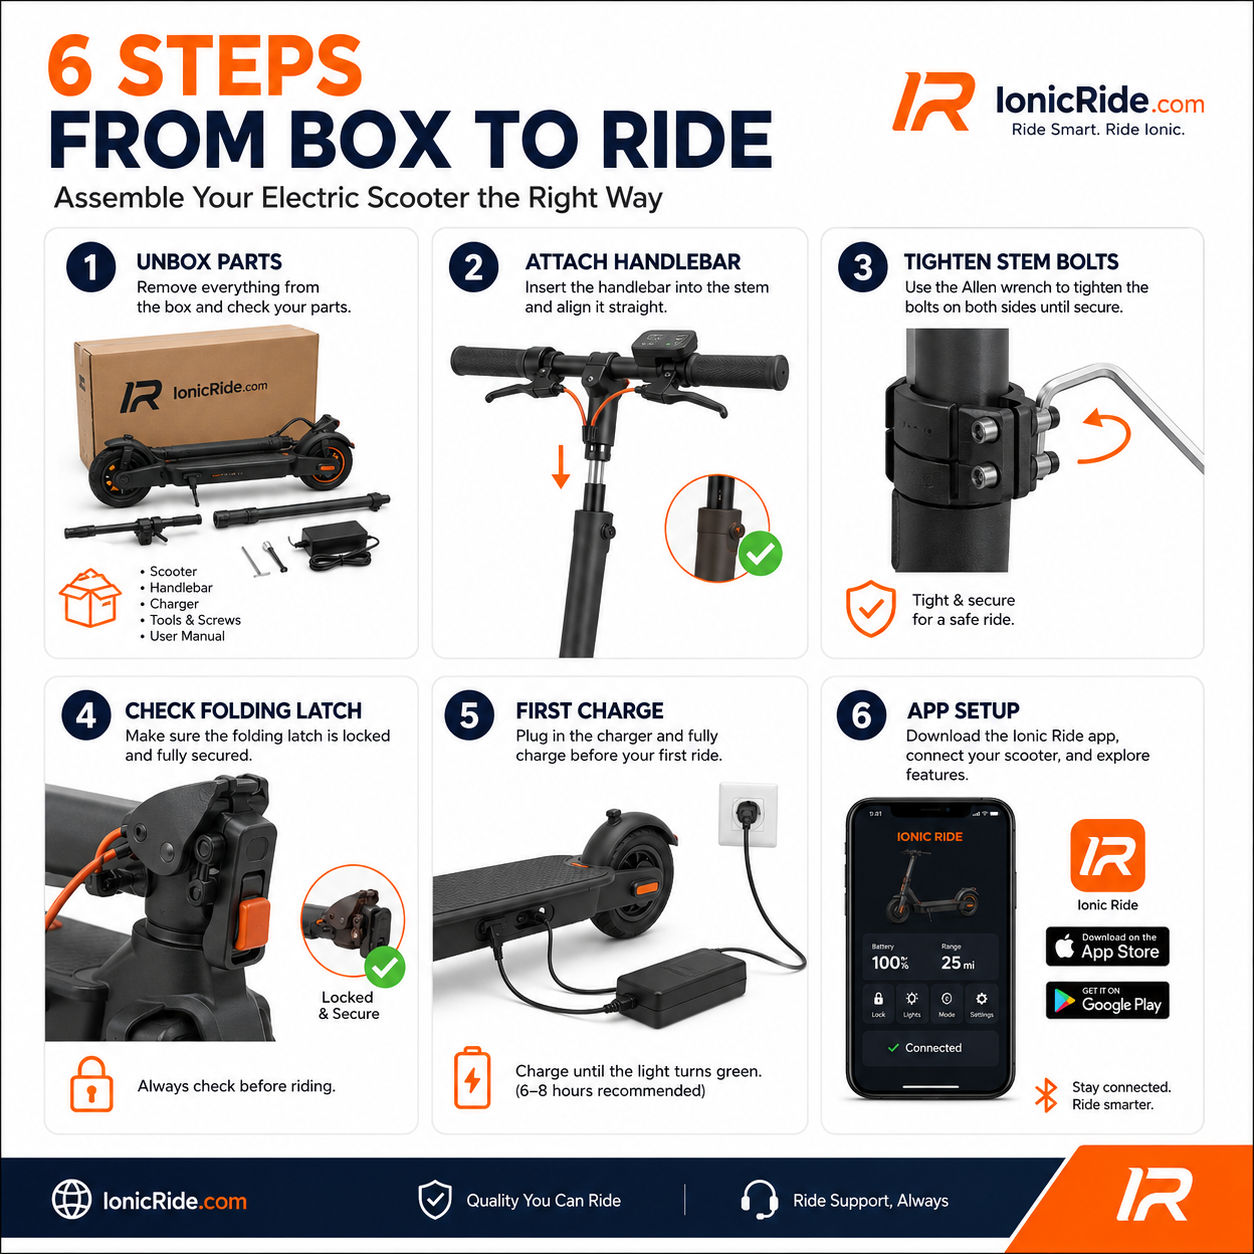
- Open the box carefully and keep all foam pieces nearby. Do not cut too deep with a blade — scooter cables and grips can sit close to the top of the packaging. Remove the scooter body, handlebar, charger, screws, tools and manual.
- Place the scooter on a stable flat surface. A clean floor is better than a sofa or bed. You want the deck level, the wheels touching the ground, and enough space to stand at the front while raising the stem.
- Raise the stem slowly. Lift the handlebar stem until it reaches the upright position. Watch the cables near the folding joint. If a cable pulls tight or gets pinched, stop and reposition it before locking anything.
- Lock the folding mechanism fully. Close the folding latch until it seats properly, then engage the safety hook, ring, clip or secondary lock if your scooter has one. Give the stem a firm forward/back pull. It should feel solid, not clicky or loose.
- Connect the handlebar cable if your model has one. Some scooters have a display cable inside the stem. Align the arrows, marks or pins before connecting. Never force the connector — bent pins can cause display errors, throttle issues or a scooter that will not turn on.
- Slide the handlebar into position. Check direction first: brake levers should face the rider, throttle should be reachable, and display should point upward. Line up the screw holes before inserting bolts.
- Thread every handlebar bolt by hand first. This is important. Start all screws lightly before fully tightening any one screw. If one screw goes in crooked, remove it and restart. Cross-threading a brand-new scooter is a painful day-one mistake.
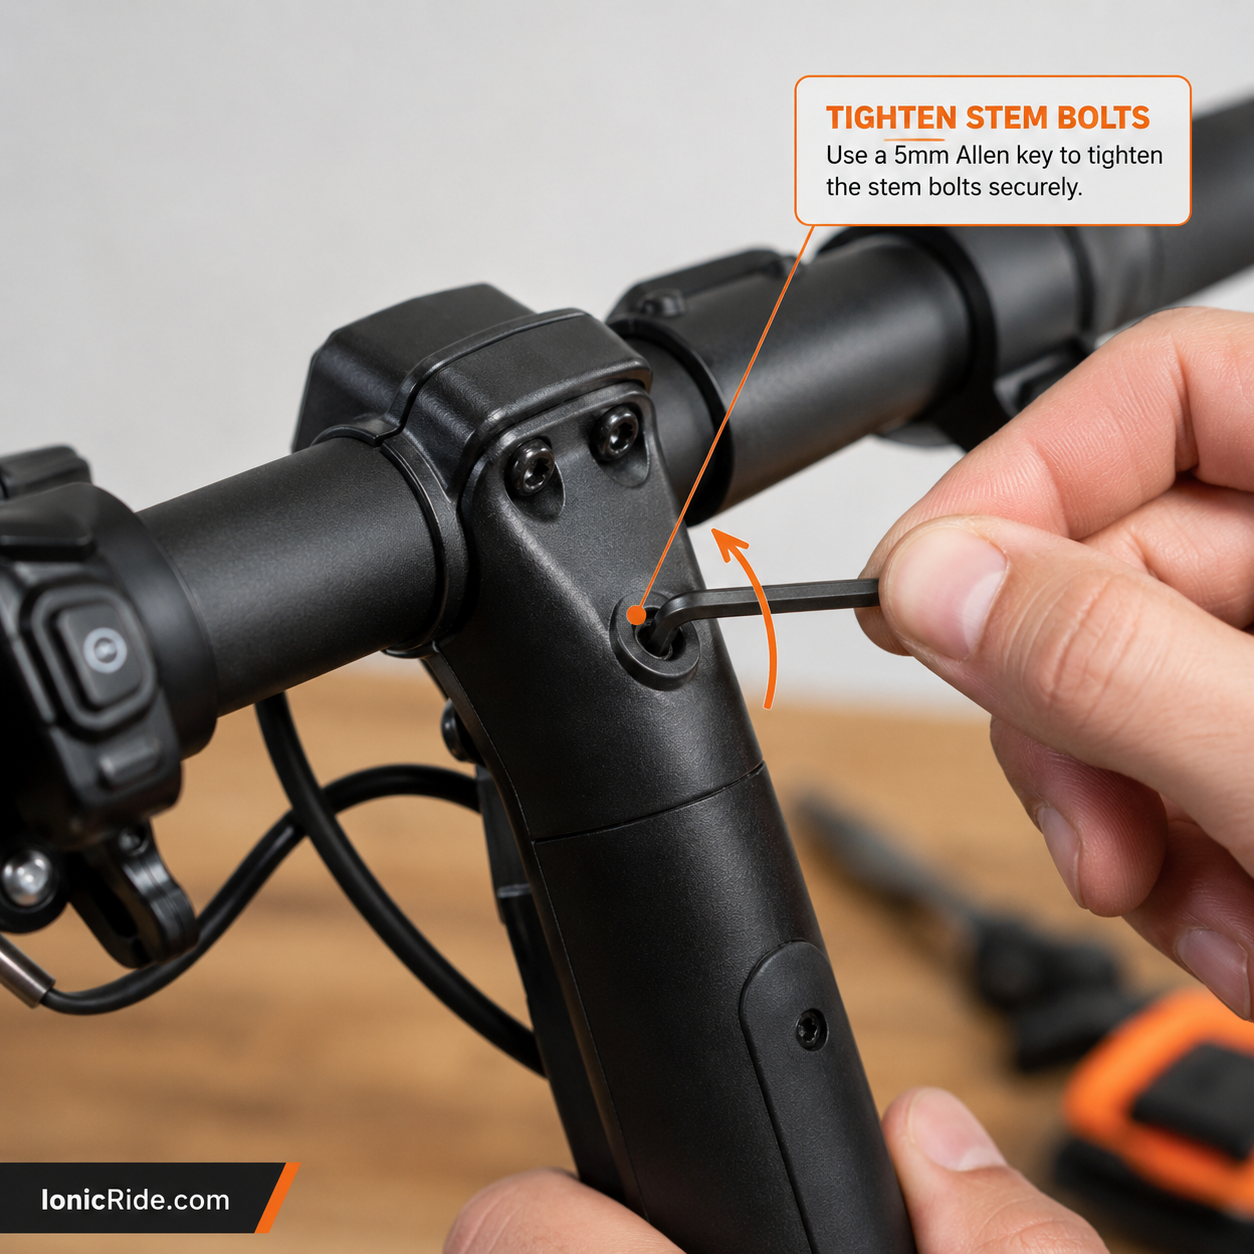
- Tighten the bolts evenly. Use the supplied Allen key and alternate between screws: top-left, bottom-right, top-right, bottom-left. Make each one snug, then go around again. Do not use full body weight. You want firm and even, not stripped metal.
- Check handlebar alignment. Stand over the scooter and confirm the front wheel points straight when the handlebar is straight. If the bar looks twisted, loosen slightly, align, then tighten again.
- Power on only after assembly is complete. Once the handlebar is secure and cables are connected, switch the scooter on. Check that the display lights up, battery level appears, and no warning icon or error code is showing.
Handlebar Bolts: The Small Step That Causes Big Problems
The handlebar bolts look like the easiest part of electric scooter setup, but they are also where beginners make the most expensive mistakes. Loose bolts make the handlebar wobble. Over-tightened bolts can strip the thread. One bolt tightened fully before the others can pull the handlebar slightly out of alignment.
The Right Way to Tighten Scooter Bolts
- Start every bolt by hand. If it does not turn smoothly for the first few rotations, it is probably not aligned.
- Do not force a crooked screw. Remove it and restart. Cross-threading can damage the stem permanently.
- Tighten in an alternating pattern. This spreads pressure evenly instead of pulling one side down first.
- Use the manual torque value if provided. Some premium scooters list exact Nm values. Follow the manual over internet guesses.
- Avoid power tools. A drill can strip small scooter bolts before you even feel resistance.
- Recheck after the first short ride. New parts settle slightly. After 10–15 minutes of gentle riding, check the bolts again.
If a new scooter’s steering feels loose, check the handlebar bolts and folding latch first, not the motor or controller. Most day-one wobble complaints come from setup, not from a defective scooter.
Check the Folding Lock Before Every First Ride
The folding mechanism is what lets your scooter fit in apartments, taxis, lifts and car boots. It is also one of the most safety-critical parts of the whole scooter. If the stem folds or moves while riding, you do not get a gentle warning — you get a crash.
After raising the stem, check three things:
- Main latch closed: the folding lever should sit fully in its locked position.
- Secondary safety lock engaged: many scooters have a hook, clip, ring or slider that prevents accidental opening.
- No front-back play: hold the front wheel between your feet and gently push/pull the handlebar. A tiny amount of model-specific play can be normal, but obvious clunking is not.
If the stem moves, clicks loudly, or feels like it can fold under pressure, do not ride. Check the latch, screws and manual. If it still feels loose, contact the seller or a repair shop before your first ride.
First Charge: What to Do Before the Battery’s First Real Ride
Most new e-scooters are shipped with a partial battery charge. That does not mean the scooter is ready for a proper ride. A full first charge helps you confirm the charger works, the charging port is fine, and the battery is accepting charge normally.
Safe First Charging Method
- Use only the original charger. The connector fitting does not prove the charger is correct. Voltage, current and polarity matter.
- Plug the charger into the wall first. Then connect it to the scooter charging port. This helps avoid small connector sparks on some chargers.
- Charge on a hard, open surface. Tile floor, concrete or a clear desk is better than carpet, sofa or bed.
- Keep it away from direct heat. In Dubai, do not charge a scooter that has been sitting in a hot car boot or direct afternoon sun. Let it cool first.
- Wait for the full indicator. Usually the charger light changes from red to green, or the app/display shows full.
- Unplug after full. Do not make “leave it charging forever” your normal habit.
Battery acting strange already? Check our e-scooter not charging guide and our charger testing guide before replacing parts.
App Pairing and Activation: Why Some New Scooters Feel “Locked”
Some electric scooters ride normally without an app. Others need official app activation before the scooter unlocks full speed, updates firmware, or even responds properly to the throttle. If your new scooter powers on but refuses to ride normally, app setup may be the missing step.
Typical app setup looks like this:
- Download the official brand app.
- Create or sign in to your account.
- Turn on Bluetooth and location permissions if the app asks.
- Power on the scooter and keep your phone nearby.
- Select the scooter model or scan the QR code.
- Complete activation, tutorial or safety confirmation.
- Set speed mode to Eco or beginner mode for the first ride.
- Check battery, lights, lock function and error messages.
Only update firmware when the scooter battery and phone battery are both comfortably charged. Do not start firmware updates while the scooter is about to die, while Bluetooth is unstable, or while you are in a rush to ride.
If your throttle still does not respond after activation, it may not be broken. Many scooters are kick-to-start, meaning the motor only engages once the scooter is already rolling. Our throttle not responding guide explains the difference between normal kick-start behaviour and an actual fault.
The Pre-First-Ride Safety Checklist
This is the part most buyers skip because they are excited. Do not skip it. The first ride should confirm the scooter is safe — not discover problems at speed.
- Handlebar bolts — all tight, even and not missing.
- Stem lock — main latch and secondary lock fully closed.
- Brake levers — squeeze and release smoothly; brakes actually stop the wheel.
- Tyres — inflated correctly if pneumatic; no cuts or flat spots.
- Throttle — responds smoothly only when expected; not stuck or jammed.
- Lights — front light, rear light and brake light working.
- Bell or horn — working and reachable without moving your hand awkwardly.
- Battery level — enough charge for testing plus a safe return.
- Riding mode — slowest mode selected for the first session.
- No rubbing sounds — spin wheels by hand and listen for brake rub, cable rub or tyre scraping.
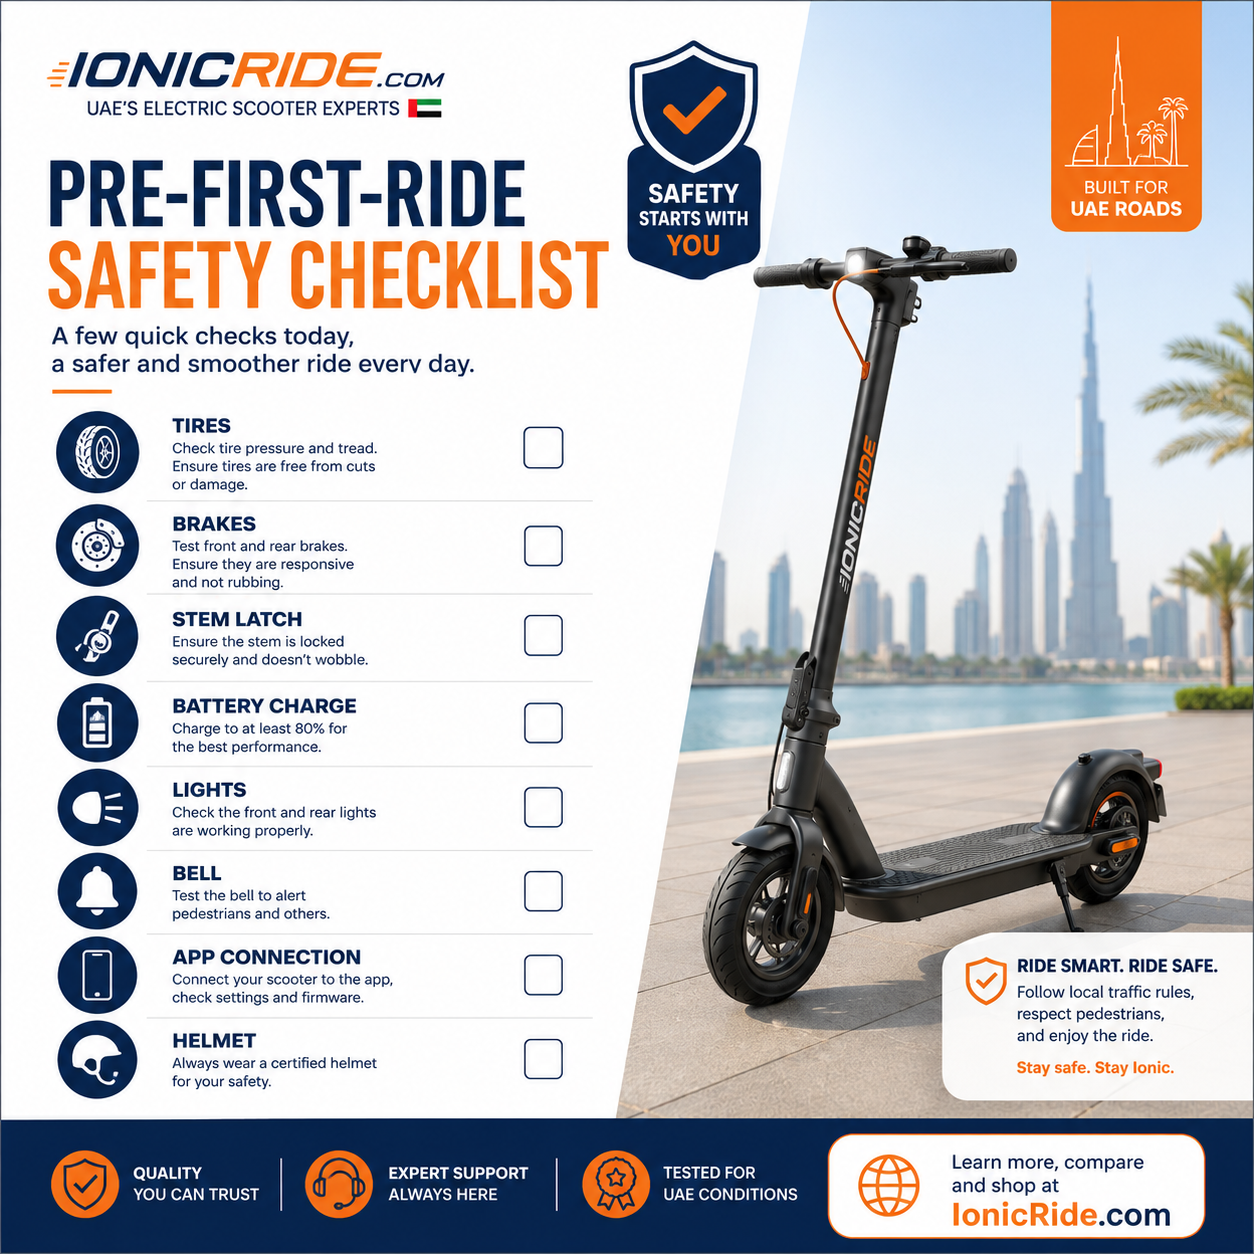
New to riding too? After setup, read how to ride an electric scooter before your first public ride.
Your First Test Ride: Keep It Boring on Purpose
The first test ride is not the time to check top speed, range or hill climbing. It is a slow mechanical check with you standing on the deck. Keep it boring:
- Choose a flat, quiet area. Empty car park, private paved area or quiet legal track at off-peak time.
- Start in the slowest mode. Eco mode is your friend on day one.
- Push first, then throttle. Many scooters need a kick-off before the motor engages.
- Ride straight at low speed. Listen for rattles, rubbing, clicking or loose parts.
- Test both brakes gently. Do not grab the front brake hard. Learn the brake feel slowly.
- Stop after 5–10 minutes and inspect again. Check bolts, stem lock, brake feel and tyre pressure.
Your first ride should end with the sentence: “Nothing exciting happened.” That means the scooter is assembled correctly, the controls feel normal, and you are ready to practise properly.
Common Electric Scooter Setup Mistakes
Throwing away the box too early. Screws, valve extensions and warranty paperwork often hide in foam.
Forcing the handlebar cable. Bent pins can cause display, throttle and power problems.
Tightening one bolt fully first. This can pull the handlebar unevenly and make alignment worse.
Using a drill on small bolts. Fast way to strip threads on a brand-new scooter.
Skipping the folding lock check. A loose stem is not a small problem — it is a crash risk.
Riding before the first charge. Shipping charge is not the same as ready-to-ride charge.
Charging on a bed or sofa. Always use a hard, open surface with airflow.
Ignoring tyre pressure. Soft tyres make the scooter feel slow, unstable and weak on range.
Updating firmware with low battery. A failed update can create avoidable headaches.
Testing top speed immediately. First ride is for safety checks, not showing off.
New Scooter Not Working After Setup? Quick Diagnosis
Day-One Setup Problems
Check First| Problem | Most Likely Cause | First Fix |
|---|---|---|
| Scooter will not turn on | Battery not charged, loose display cable, transport mode | Charge fully, check connector, complete app activation |
| Throttle does nothing | Kick-to-start mode, app lock, brake lever engaged | Push to rolling speed, unlock app, check brake lever |
| Handlebar feels loose | Uneven bolts or folding latch not locked | Retighten evenly and inspect stem latch |
| Brake rub sound | Disc alignment, shipping shift, bent rotor | Spin wheel, identify rub, adjust before riding fast |
| Battery drains quickly | Partial first charge, soft tyres, sport mode | Full charge, inflate tyres, test in Eco mode |
| App cannot pair | Wrong app, Bluetooth permission, already bound account | Use official app, enable permissions, contact seller if bound |
If setup checks do not solve it, use our repair guides: scooter won’t turn on, brakes not working, and scooter making noise.
Dubai Setup Notes: Heat, Apartments, Metro and Legal Riding
Electric scooter setup is mostly the same everywhere, but Dubai adds a few real-world details.
Do Not First-Charge in Heat
If the scooter was delivered in a hot van or left in a car boot, let the battery cool indoors before charging. Heat is already hard on lithium batteries; charging while the pack is hot adds extra stress. This matters especially from May to September. Our Dubai summer e-scooter survival guide covers the heat habits that protect the battery.
Apartment Charging Needs Common Sense
Do not charge on a mattress, sofa, carpet, balcony sun patch or near curtains. Use a hard surface with airflow and the original charger. If your building has rules about charging personal mobility devices, follow them. For a deeper safety breakdown, read our guide to charging an e-scooter in Dubai apartments.
Check the Fold Before Metro or Taxi Use
If your scooter is part of a Metro commute, practise folding and unfolding it at home before doing it in a station entrance. A half-locked stem after unfolding is a common beginner mistake. See our Dubai Metro scooter guide and taxi/Uber/Careem scooter guide if you plan to carry it around the city.
Make It Legal Before Public Riding
Assembly is only the mechanical setup. Before riding in public areas, check the current Dubai e-scooter rules, permitted zones and permit requirements. Start with our RTA e-scooter permit guide and Dubai legal zones map.
What to Do After the Scooter Is Assembled
Once the scooter is fully assembled and checked, do these three things before using it as daily transport:
- Practise riding properly. A new scooter feels simple until you need to brake quickly. Use our beginner riding guide before commuting.
- Buy the right safety basics. Choose the right electric scooter helmet for Dubai first, then a lock, pump, lights if needed and basic puncture backup. Our must-have accessories guide keeps it practical.
- Learn the monthly checks. Tyres, brakes, bolts, folding latch and battery habits matter more than people think. A small maintenance habit prevents most annoying repairs.
Still deciding whether your scooter choice was smart? Compare it with our best e-scooters for Dubai by price range and our worst electric scooters to avoid.
The Bottom Line
Assembling an electric scooter is not difficult — but rushing the first setup is how day-one problems start. Raise and lock the stem, connect cables carefully, attach the handlebar, tighten bolts evenly, charge fully, activate the app if needed, and check every safety item before riding.
The two most important checks are the folding lock and brakes. A scooter with a loose stem or untested brakes should not be ridden, even if it is brand new.
Your first ride should be slow, boring and controlled. If the scooter feels stable, brakes cleanly, makes no strange noises and the bolts stay tight after a short test, then you are ready to learn properly and start using it with confidence.
Setup Done? Learn to Ride It Properly
The scooter is assembled. Now make your first ride safe, smooth and legal.
Frequently Asked Questions
Most standing electric scooters need light assembly. Usually the scooter body is already built, but the stem is folded and the handlebar must be attached with screws. You may also need to connect a display cable, charge the battery and activate the scooter through an app.
For most models, 20–45 minutes is realistic. The handlebar itself may take only a few minutes, but a proper first setup includes inspection, folding-lock check, bolt tightening, first charge, app pairing and the pre-first-ride safety check.
Yes. A new scooter is usually shipped with partial battery charge, not a proper full riding charge. Use the original charger, charge on a hard open surface, and wait until the charger light or app shows full before your first real ride.
They should be firm and even, but not forced until the threads strip. Start all bolts by hand first, then tighten in an alternating pattern. If your manual gives a torque value, follow that. Avoid power tools unless the brand specifically allows them.
It may be normal. Many scooters are kick-to-start, meaning the motor only engages after you push the scooter to a slow rolling speed. Other causes include app lock, transport mode, low battery, loose handlebar cable or a brake lever that is slightly engaged.
Some scooters require app activation, while others ride without it. The app may control activation, locking, speed modes, lights, firmware updates and battery information. Use the official app for your brand, not a random third-party app.
No. First check the folding lock, brakes, tyres, lights, bell, throttle, battery and riding mode. Push the scooter by hand and test braking before using motor power. A brand-new scooter still needs a safety check.
Most scooters include the required Allen key or hex key. A tyre pressure gauge and pump are also useful if your scooter has pneumatic tyres. Your phone may be needed for app pairing and activation.
Check handlebar bolts, folding latch, secondary stem lock, tyre pressure, brakes, throttle, lights, bell, display, battery level and riding mode. Also listen for rubbing, rattling or clicking while pushing the scooter by hand.
The mechanical assembly is the same, but battery care matters more. Do not first-charge a scooter that has been sitting in direct sun or a hot car boot. Let it cool indoors, charge on a hard open surface, and avoid first rides during peak summer heat.