
How to Replace an Electric Scooter Battery: Step-by-Step + Safety
To replace an electric scooter battery safely, first confirm the old pack is not swollen, hot, leaking or burned. Then match the replacement battery by voltage, physical size, connector, BMS rating and charger voltage before opening the deck, disconnecting the old pack, installing the new one and testing slowly.
This is not like changing AA batteries in a remote. An e-scooter battery is a lithium pack with enough stored energy to damage the controller, melt connectors or start a fire if the wrong pack is fitted or the terminals are shorted.
If the battery is simply old and weak, replacement can be straightforward. If it is swollen, smoking, water-damaged, punctured or smelling chemical, do not DIY it. That is a safety job, not a tutorial job.
⚡ Quick Answer — Battery Replacement in 8 Checks
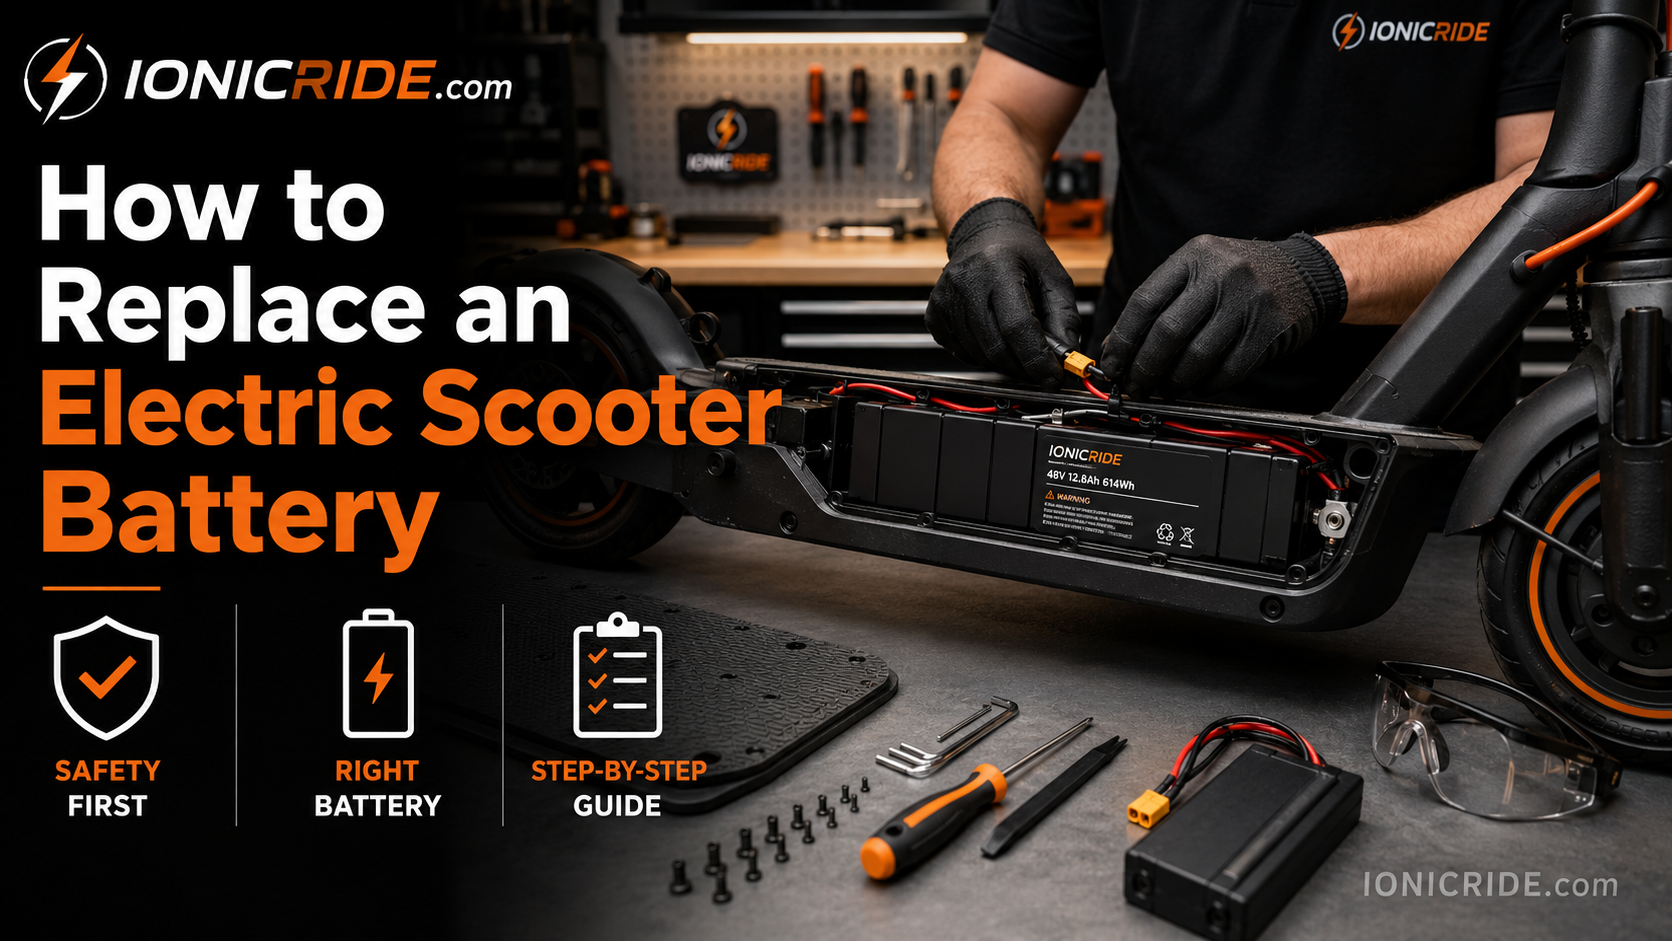
Before You Touch the Battery: Know When Not to DIY
Battery replacement is only a reasonable DIY job when the old battery is normal-looking but weak, tired or no longer holding range. It is not a DIY job when the pack is physically damaged or showing danger signs.
Swollen or puffed-up pack. The battery casing or shrink wrap looks bloated, rounded or pressurised.
Heat while off or unplugged. A battery that heats by itself is not normal.
Chemical, sweet or solvent-like smell. Treat this as a serious warning sign.
Liquid, corrosion or white residue. Do not touch casually and do not charge.
Burn marks or melted connectors. This can mean high resistance, short circuit or overheating.
Water damage. Especially after rain, washing, flooding or Dubai parking basement leaks.
Smoke, hissing or popping sounds. Move away, keep others away and treat it as an emergency.
If your battery is swollen or damaged, read our swollen e-scooter battery emergency guide first. Do not charge it, open it, press it flat, puncture it or try to “test it one more time.”
Should You Replace the Battery Yourself or Use a Shop?
The honest answer: DIY is fine for simple pack swaps on clean scooters if you know what you are matching. A shop is better when the fault might be the charger, controller, BMS, wiring, fuse, charging port or display — not just the cells.
DIY vs Repair Shop
Decision Guide| Situation | DIY? | Better Choice |
|---|---|---|
| Old battery with poor range, no swelling | Possible | DIY if exact replacement is available |
| Battery swollen, hot, leaking or burned | No | Repair shop / approved disposal |
| Connector is melted or wires are blackened | No | Repair shop diagnosis |
| Scooter shuts off uphill | Maybe | Test battery sag, BMS and controller first |
| Battery will not charge | Maybe | Test charger and charging port first |
| You want higher voltage upgrade | No | System-level upgrade by specialist |
Before buying a pack, compare DIY cost with local labour in our electric scooter battery replacement cost in Dubai guide and our battery repair vs replace cost breakdown.
How to Choose the Correct Replacement Battery
This is the most important part of the whole job. Most battery problems after replacement come from buying the wrong pack, not from the installation itself.
1. Match the Voltage First
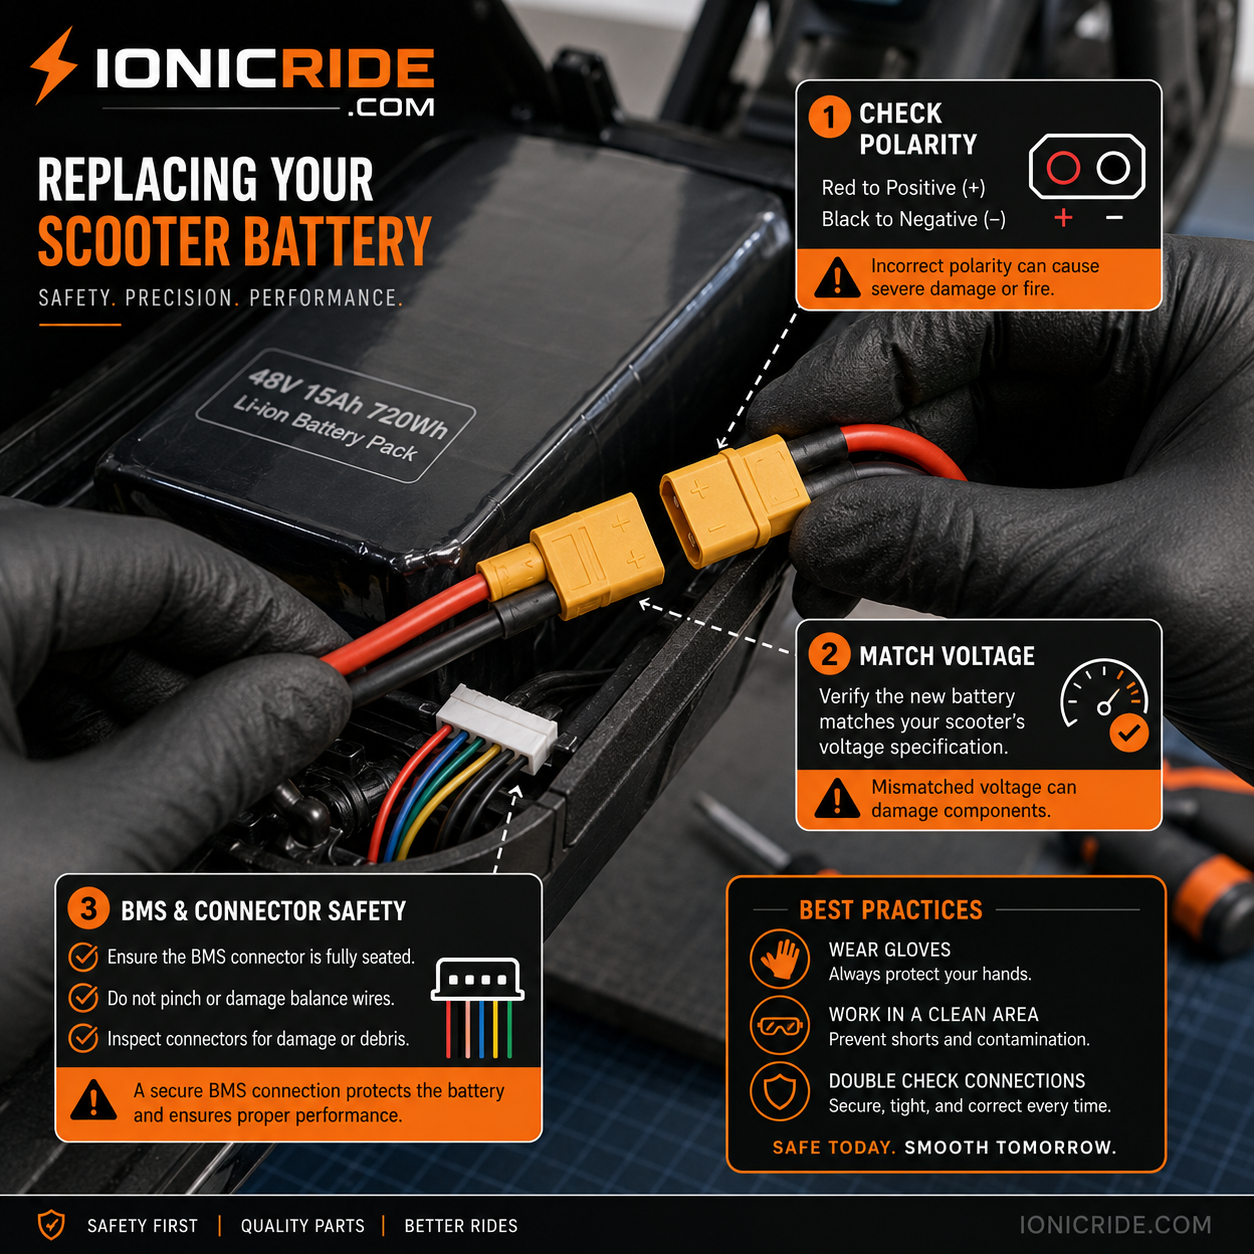
Your scooter’s controller is designed for a specific battery voltage. Common e-scooter packs include 36V, 48V and 52V, but the label on your old pack is the boss. Do not guess based on the charger plug or what a seller says in a WhatsApp message.
Installing a higher-voltage battery into a scooter not designed for it can damage the controller, display, lights or motor. Installing a lower-voltage pack can cause error codes, weak power or immediate shutdown.
2. Match the Charger Voltage
A 36V lithium pack normally uses a different full-charge voltage than a 48V lithium pack. The charger must match the battery system. If you replace the battery and keep the wrong charger, you can undercharge, overcharge or damage the BMS.
3. Check Physical Size
The replacement pack must fit inside the deck without crushing cells or pinching wires. “Same voltage and capacity” is not enough if the pack is taller, wider or longer than the deck space.
4. Match the Connector
Look at the main discharge connector, charging connector and any signal wires. XT60, XT90, bullet connectors, JST plugs and brand-specific connectors can look simple, but polarity and wire order matter. Never connect by colour alone if you are unsure.
5. Check the BMS Rating
The BMS protects the pack during charge and discharge. A weak BMS can shut the scooter off under load even if the cells are good. For heavier riders, hills, high-power scooters or Dubai heat, BMS quality matters a lot.
New to BMS? Read what a BMS does in an e-scooter battery before buying a replacement pack.
Fake Battery Packs: How to Spot a Bad One Before It Goes in Your Scooter
The UAE market has everything: genuine packs, decent aftermarket packs, rebuilt packs, used packs, and mystery batteries wearing optimistic stickers. A fake or low-quality pack may work for a week and then sag, overheat, refuse to charge or shut down under load.
- Check the label. It should show voltage, capacity, Wh rating, model/spec and some supplier information.
- Be suspicious of huge capacity claims. If a tiny, cheap pack claims impossible range, it is probably marketing, not physics.
- Compare weight. A pack claiming much higher capacity should not feel dramatically lighter than the old one.
- Inspect wires. Very thin discharge wires on a high-power scooter are a bad sign.
- Check build quality. Loose shrink wrap, sharp edges, messy tape and weak connectors are warning signs.
- Ask about warranty. No invoice, no warranty and no return policy means you own the risk.
- Avoid “universal” claims. There is no battery that safely fits every scooter just because the plug looks similar.
The most dangerous battery is not always the obviously broken one. Sometimes it is the cheap “upgraded” pack with unknown cells, weak BMS and a connector that was changed by hand to make it fit your scooter.
Tools and Safety Setup
Do not do battery work on a bed, carpet, balcony in direct sun, metal table or messy floor. Choose a dry, clean, non-metal work surface with good light and no children or pets nearby.
Tools You May Need
- Allen keys or screwdriver set for deck screws.
- Plastic pry tool for lifting covers without damaging wires.
- Multimeter for checking voltage and polarity.
- Insulated gloves.
- Small container for screws.
- Phone camera for wiring photos.
- Cable ties or insulation tape for neat wire routing.
Remove jewellery. Rings, watches and bracelets can short terminals.
Never bridge battery terminals with metal tools. A short circuit can melt connectors quickly.
Do not cut both battery wires together. If wires need modification, stop and use a professional.
Do not solder directly onto lithium cells. Cell-level work is for battery builders with proper equipment.
Do not charge an open or unstable pack. The pack should be secured and wiring checked first.
How to Replace an Electric Scooter Battery Step by Step
The steps below are for a normal deck-mounted lithium battery pack replacement where the battery has plug-in connectors. If your scooter requires cutting, soldering, spot welding, cell rebuilding or custom wiring, treat that as a workshop job.
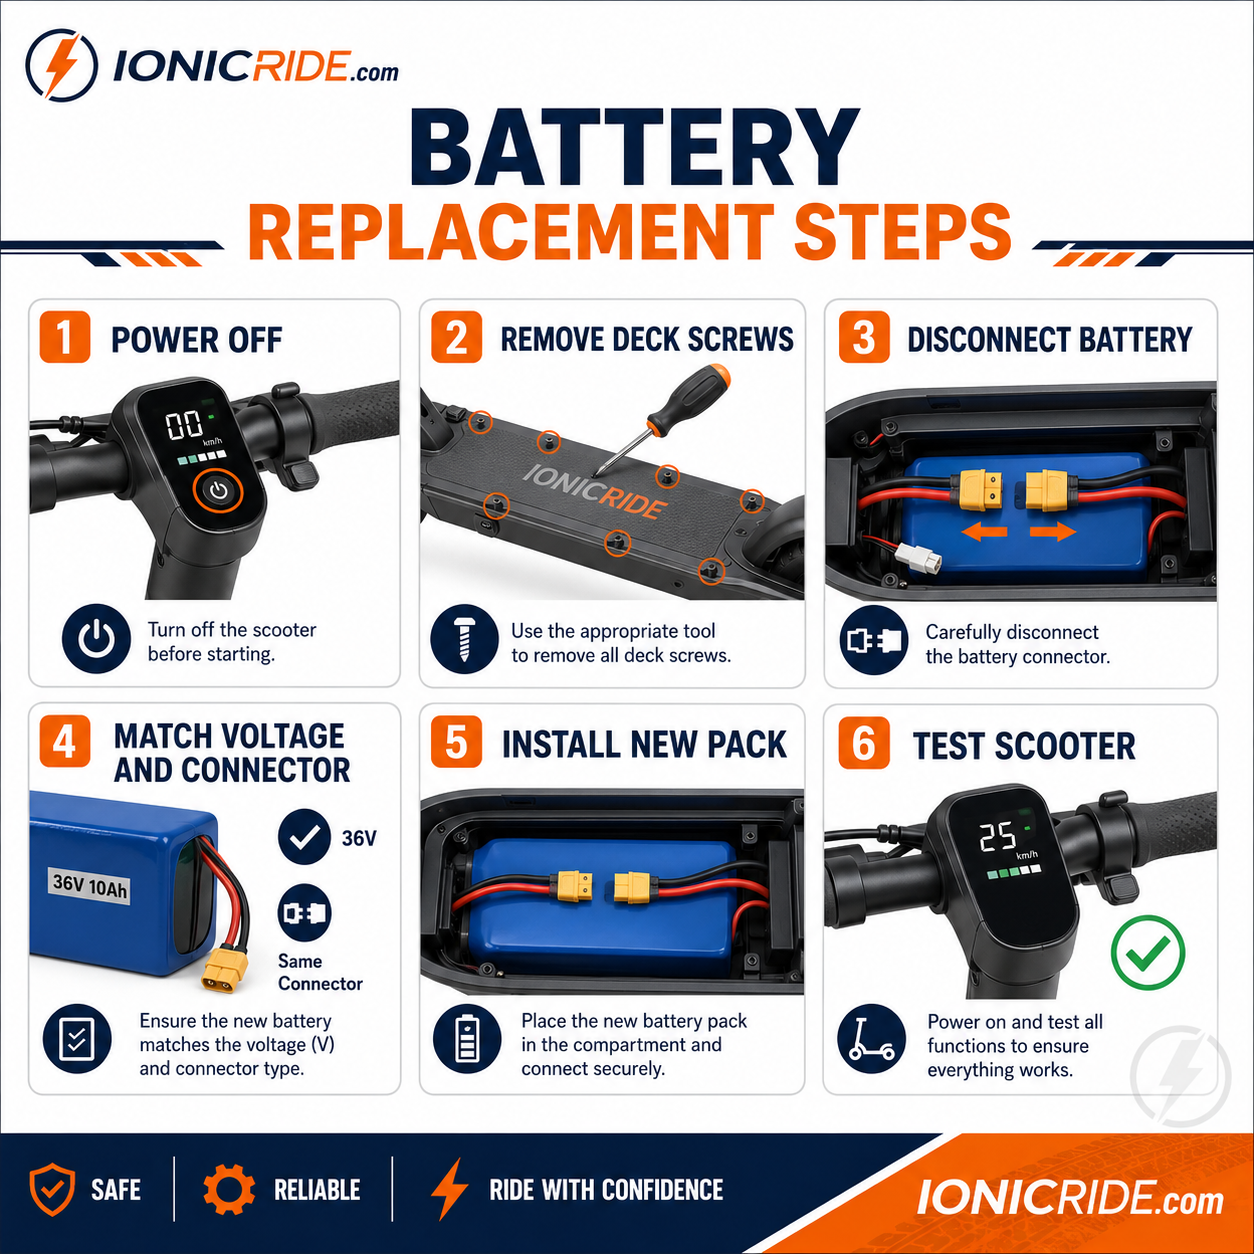
- Power off the scooter and unplug the charger. Never work on the scooter while it is connected to the wall charger. Hold the power button to make sure the display is off.
- Let the scooter cool indoors. If the scooter was ridden hard or left in Dubai heat, let it cool before opening the deck. Heat makes battery work riskier and less pleasant.
- Remove the deck or battery cover screws. Keep screws in order because some scooters use different screw lengths. Lift the cover slowly — there may be a light wire, charging-port wire or gasket attached.
- Inspect before disconnecting anything. Look for swelling, burn marks, melted plastic, corrosion, water marks or crushed wires. If you see any serious damage, stop and use a repair shop.
- Take photos of every connector. Photograph the battery connector, controller connector, charging port, fuse, BMS wires and cable routing. These photos are your map during reassembly.
- Disconnect the main battery connector. Pull from the connector body, not the wire. Some connectors are tight; wiggle gently. If the connector is melted or stuck, do not force it with metal tools.
- Disconnect charging or signal wires if present. Some scooters have separate charging wires, battery data wires or display communication wires. Label them if needed.
- Remove the old battery pack carefully. Lift it out without bending, crushing or puncturing it. If adhesive foam holds it down, work slowly with a plastic tool, not a screwdriver stabbed under the pack.
- Compare old and new packs side by side. Check voltage label, connector type, wire length, dimensions, polarity, capacity and BMS/discharge rating before installing.
- Place the new pack in the deck. It should sit flat without pressure on the cells. Wires should not pass under sharp deck edges or screw holes.
- Reconnect matching connectors. Connect only matching plugs with confirmed polarity. Do not force a plug that does not fit naturally. Do not twist bare wires together as a “temporary” fix.
- Secure the pack and route wires neatly. The battery should not rattle. Use original foam, straps or safe padding if needed. Keep wires away from the wheel, suspension movement, brake parts and screw holes.
- Power on before closing the deck. Check the display, battery level and error codes. Turn lights on. Gently roll the wheel if needed. If you smell heat, hear popping, see sparks or get an error, turn it off and disconnect.
- Test charging briefly. Plug the charger into the wall first, then into the scooter. Confirm the charger light behaves normally. Do not leave it unattended during this first check.
- Close the deck cover evenly. Make sure no wire is trapped under the cover. Tighten screws evenly. Do not force the cover down if the new battery is too tall.
- Do a slow test ride. Ride gently for 5–10 minutes in the lowest mode. Stop and recheck for heat, smell, rattling, loose screws or unusual battery drop.
After Replacement: What to Test Before a Real Ride
A battery can power the display and still fail under load. That is why the post-install test matters.
- Display powers on normally with no strange error codes.
- Battery percentage looks realistic and does not instantly jump up/down.
- Charger behaves normally with no heat, smell or flickering connection.
- No connector heating after a short low-speed ride.
- No rattling inside the deck when rolling over small bumps.
- No sudden shutdown under gentle acceleration.
- No battery sag warning when climbing a mild slope.
- Range improves gradually after a few normal charge cycles.
If the scooter still shuts off or loses power after replacement, check our guides on scooter shutting off while riding, losing power uphill and battery range dying early.
Danger Signs After Installing a New Battery
Do not ignore warning signs just because the battery is new. A new pack can still be wrong, weak, fake, badly wired or poorly built.
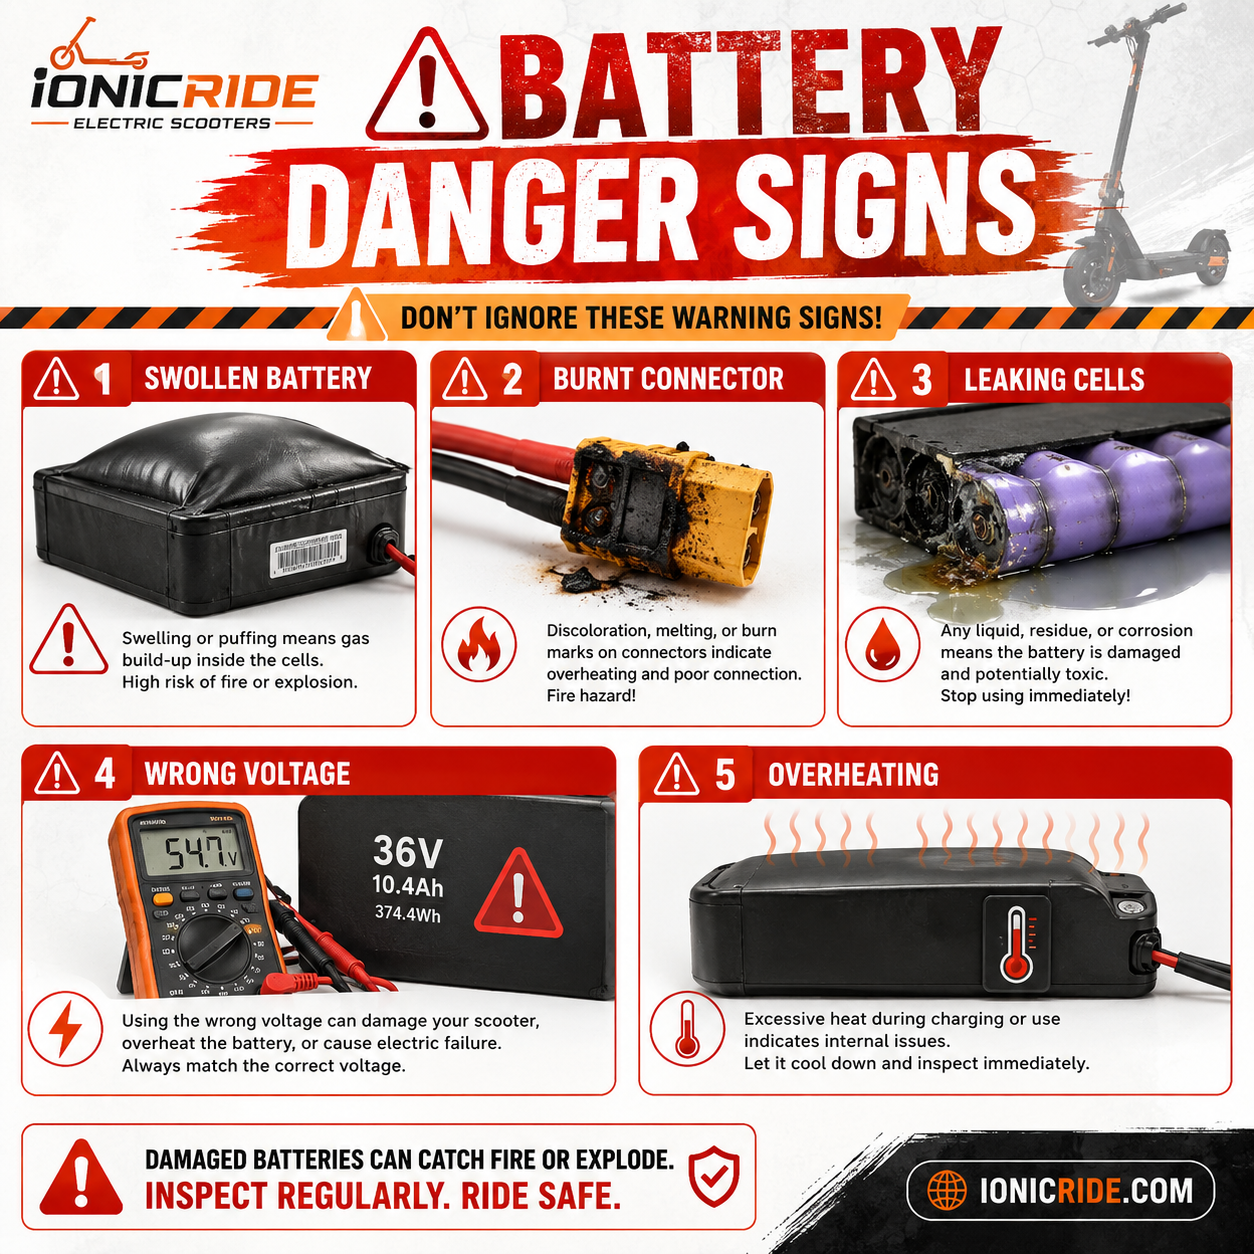
The deck becomes unusually hot. Mild warmth after riding can happen; strong heat is not normal.
The scooter cuts off under acceleration. Could be weak BMS, voltage sag, bad connector or controller issue.
The charger gets extremely hot or flickers. Stop charging and inspect charger/port compatibility.
You smell plastic, chemical or burning. Turn it off and move away from flammable items if safe.
The battery percentage drops suddenly. This can mean voltage sag, poor cells or wrong BMS.
The connector area shows discoloration. Heat at connectors usually means resistance, poor contact or overload.
Can You Upgrade to a Bigger Battery?
Sometimes yes — but “bigger” must mean more capacity at the same voltage, not random extra voltage.
A higher-capacity same-voltage pack can increase range if it fits safely and uses a proper BMS. But there are limits:
- The pack must physically fit without crushing cells or wires.
- The BMS must handle the scooter’s peak current.
- The charger must match the battery voltage and chemistry.
- The deck cover must close naturally without pressure.
- The added weight should not overload the scooter or affect handling.
- The controller and display should read the battery correctly.
A higher-voltage upgrade is a different job. It may require controller, display, charger and sometimes motor compatibility checks. If you are thinking “36V to 48V,” treat it as a full electrical upgrade, not a battery swap.
Trying to understand voltage differences? Read our 500W vs 1000W electric scooter guide and heavy rider scooter guide before chasing more power.
Dubai Heat Makes Battery Replacement Less Forgiving
Dubai heat does not change the basic replacement steps, but it reduces your margin for sloppy battery choices. Weak cells, poor BMS design and bad connectors show their problems faster when the scooter is ridden in hot weather.
- Do not install or charge a battery that has been sitting in a hot car boot. Let it cool indoors first.
- Avoid first test rides at peak afternoon heat. Early morning or evening testing is smarter.
- Watch for voltage sag under load. Heat plus hills plus rider weight can expose weak packs quickly.
- Keep charging away from direct sun. Especially on balconies, windowsills and storage rooms without airflow.
- Do not store old packs casually. A removed lithium pack is still an energy source, not harmless scrap.
For UAE conditions, also read electric scooter summer survival in Dubai, how Dubai heat affects batteries and charging an e-scooter in Dubai apartments.
How to Dispose of the Old Battery in the UAE
Do not put an electric scooter lithium battery in normal household waste. Do not leave it beside a rubbish chute. Do not keep a damaged pack in your room “until later.” Old lithium batteries need responsible disposal through proper battery, e-waste or hazardous-waste channels.
For a normal, non-damaged old pack, ask the battery seller or scooter repair shop if they collect used packs for recycling. Many proper repair businesses have a safer route for battery waste than a random household bin.
For a swollen, burned, leaking or water-damaged pack, do not carry it around casually in a backpack or courier it like a phone case. Contact a competent repair shop or approved waste/recycling channel and explain that it is a damaged lithium battery.
If the pack is lithium, high-capacity, damaged or from an electric scooter, treat it as special waste — not regular trash. When in doubt, ask a professional scooter shop or approved recycling/waste handler before moving it.
Common Battery Replacement Mistakes
Buying by shape only. A pack that fits physically may still be wrong electrically.
Ignoring voltage. Wrong voltage can damage the controller or make the scooter unusable.
Trusting fake capacity stickers. Cheap packs often promise more range than the cells can deliver.
Forcing connectors. Similar plugs can have different polarity or wiring.
Skipping BMS rating. A weak BMS can shut off under load even with decent cells.
Crushing wires under the deck cover. This creates intermittent faults and possible shorts.
Charging immediately after heat exposure. Let the pack cool first.
DIY on swollen batteries. That is not a money-saving hack. It is a serious safety risk.
Throwing the old pack in the bin. Lithium batteries need proper disposal channels.
New Battery Not Working? Quick Troubleshooting
After-Replacement Problems
Check First| Problem | Likely Cause | First Check |
|---|---|---|
| Scooter will not turn on | Loose connector, wrong voltage, blown fuse, BMS asleep | Check battery voltage and main connector |
| Charger light stays green | Wrong charger, disconnected charge port, BMS issue | Confirm charger voltage and charge connector |
| Turns on but throttle does nothing | Brake sensor, app lock, controller fault, wrong battery wiring | Check brake lever and throttle guide |
| Shuts off under acceleration | Weak BMS, voltage sag, bad connector, undersized pack | Test under gentle load and inspect connectors |
| Range still poor | Fake capacity, soft tyres, brake drag, old controller issue | Check tyre pressure and battery Wh rating |
| Deck becomes hot | Overload, bad connector, wrong BMS, internal pack fault | Stop riding and inspect immediately |
If you are not sure the battery is the real problem, check battery won’t charge, charger not working and controller problems before spending money on another pack.
The Bottom Line
You can replace an electric scooter battery yourself only when the pack is normal-looking, the replacement is correctly matched, and the scooter uses plug-in connectors. The job becomes risky when the battery is swollen, burned, wet, leaking, custom-wired or unknown.
The replacement pack must match voltage, connector, charger, physical size and BMS capability. Capacity alone is not enough. A cheap fake “high range” battery can create more problems than the old weak pack.
If you are in Dubai and the battery shows danger signs, do not gamble. Use a competent scooter repair shop and proper disposal route. Saving a little labour money is not worth damaging the scooter, your apartment or yourself.
Not Sure DIY Is Worth It?
Compare battery pack cost, labour cost and repair-vs-replace options before opening the deck.
Frequently Asked Questions
Yes, if the battery is not swollen, leaking, burned or damaged, and you can match the correct voltage, connector, BMS rating, charger voltage and physical size. If you are unsure about any of those, a repair shop is safer.
Check the label on the old battery pack and match voltage, capacity range, charger voltage, connector type, dimensions and BMS/discharge rating. Do not buy based only on the scooter name because brands often sell multiple versions.
A bigger same-voltage battery may be possible if it fits safely and has a suitable BMS. A higher-voltage battery is not a simple replacement — it can damage the controller, display, lights or motor unless the full system supports it.
The BMS is the Battery Management System. It protects the pack during charging and discharging, balances cells and cuts power during unsafe conditions. A poor BMS can cause shutdowns, charging problems, overheating or poor range.
No. A swollen, hot, leaking or chemical-smelling battery should not be opened, charged, punctured or handled casually. Move it away from flammable materials if safe and contact a qualified shop or approved disposal channel.
It depends on voltage, capacity, brand, cell quality and labour. Budget scooter packs are cheaper than long-range premium packs. Always compare DIY pack cost with shop replacement, because a shop can also test the charger, controller and wiring.
No. The charger must match the battery voltage and connector. A wrong charger can fail to charge, damage the BMS, overcharge the pack or create a safety risk.
Possible causes include weak BMS, wrong voltage, loose connector, undersized battery, bad controller, blown fuse, brake sensor issue or voltage sag under load. Stop riding and diagnose it before using the scooter normally.
Do not put it in normal household waste. Use approved e-waste, battery recycling or hazardous-waste channels, or ask a competent scooter repair shop to handle disposal properly. Treat damaged lithium packs as special waste.
Warning signs include a very low price, no proper label, unrealistic Ah or Wh claims, thin wires, poor shrink wrap, mismatched connector, no BMS information, no supplier details, no invoice and no warranty.